Quantcast
Channel: Re:amaze Blog
Viewing all 585 articles
Browse latest View live

Please reply above this line

$
0
0

We’re excited to announce our newest Enterprise feature! In an ad-hoc survey conducted a few weeks ago, the top request under “Product Improvement” was for existing features to be more “Enterprise” focused. The need for growing businesses to pivot away from “customer friendliness” to more robotic and Enterprise-focused processes has indeed garnered our attention.

After intense brainstorming, analyzing our Enterprise competitors, and deliberation, the Reamaze team decided to implement the single most important and common feature: “Please reply above this line”. This revolutionary change will serve to make all of Reamaze’s features universally more robotic, more devoid of human emotions, and infinitely more “Enterprise” capable.

Sample email from competitor.

In a short closed beta test session for this new feature, we interviewed one of our users on their thoughts of this revolutionary change:

Nothing will make our customers more confident in our company than the assurance that every one of their emails is handled by robotic Enterprise processes. As you grow a business, it’s important to be less customer friendly and just push to get shit resolved. Robotic processes are a godsend in that respect.

We’re confident that this new iteration of Reamaze will push the boundaries of what’s possible in robotic support and enhance customer conversations in a way that will prevent customers from ever wanting to talk to you again, saving you precious time and resources in helping them.

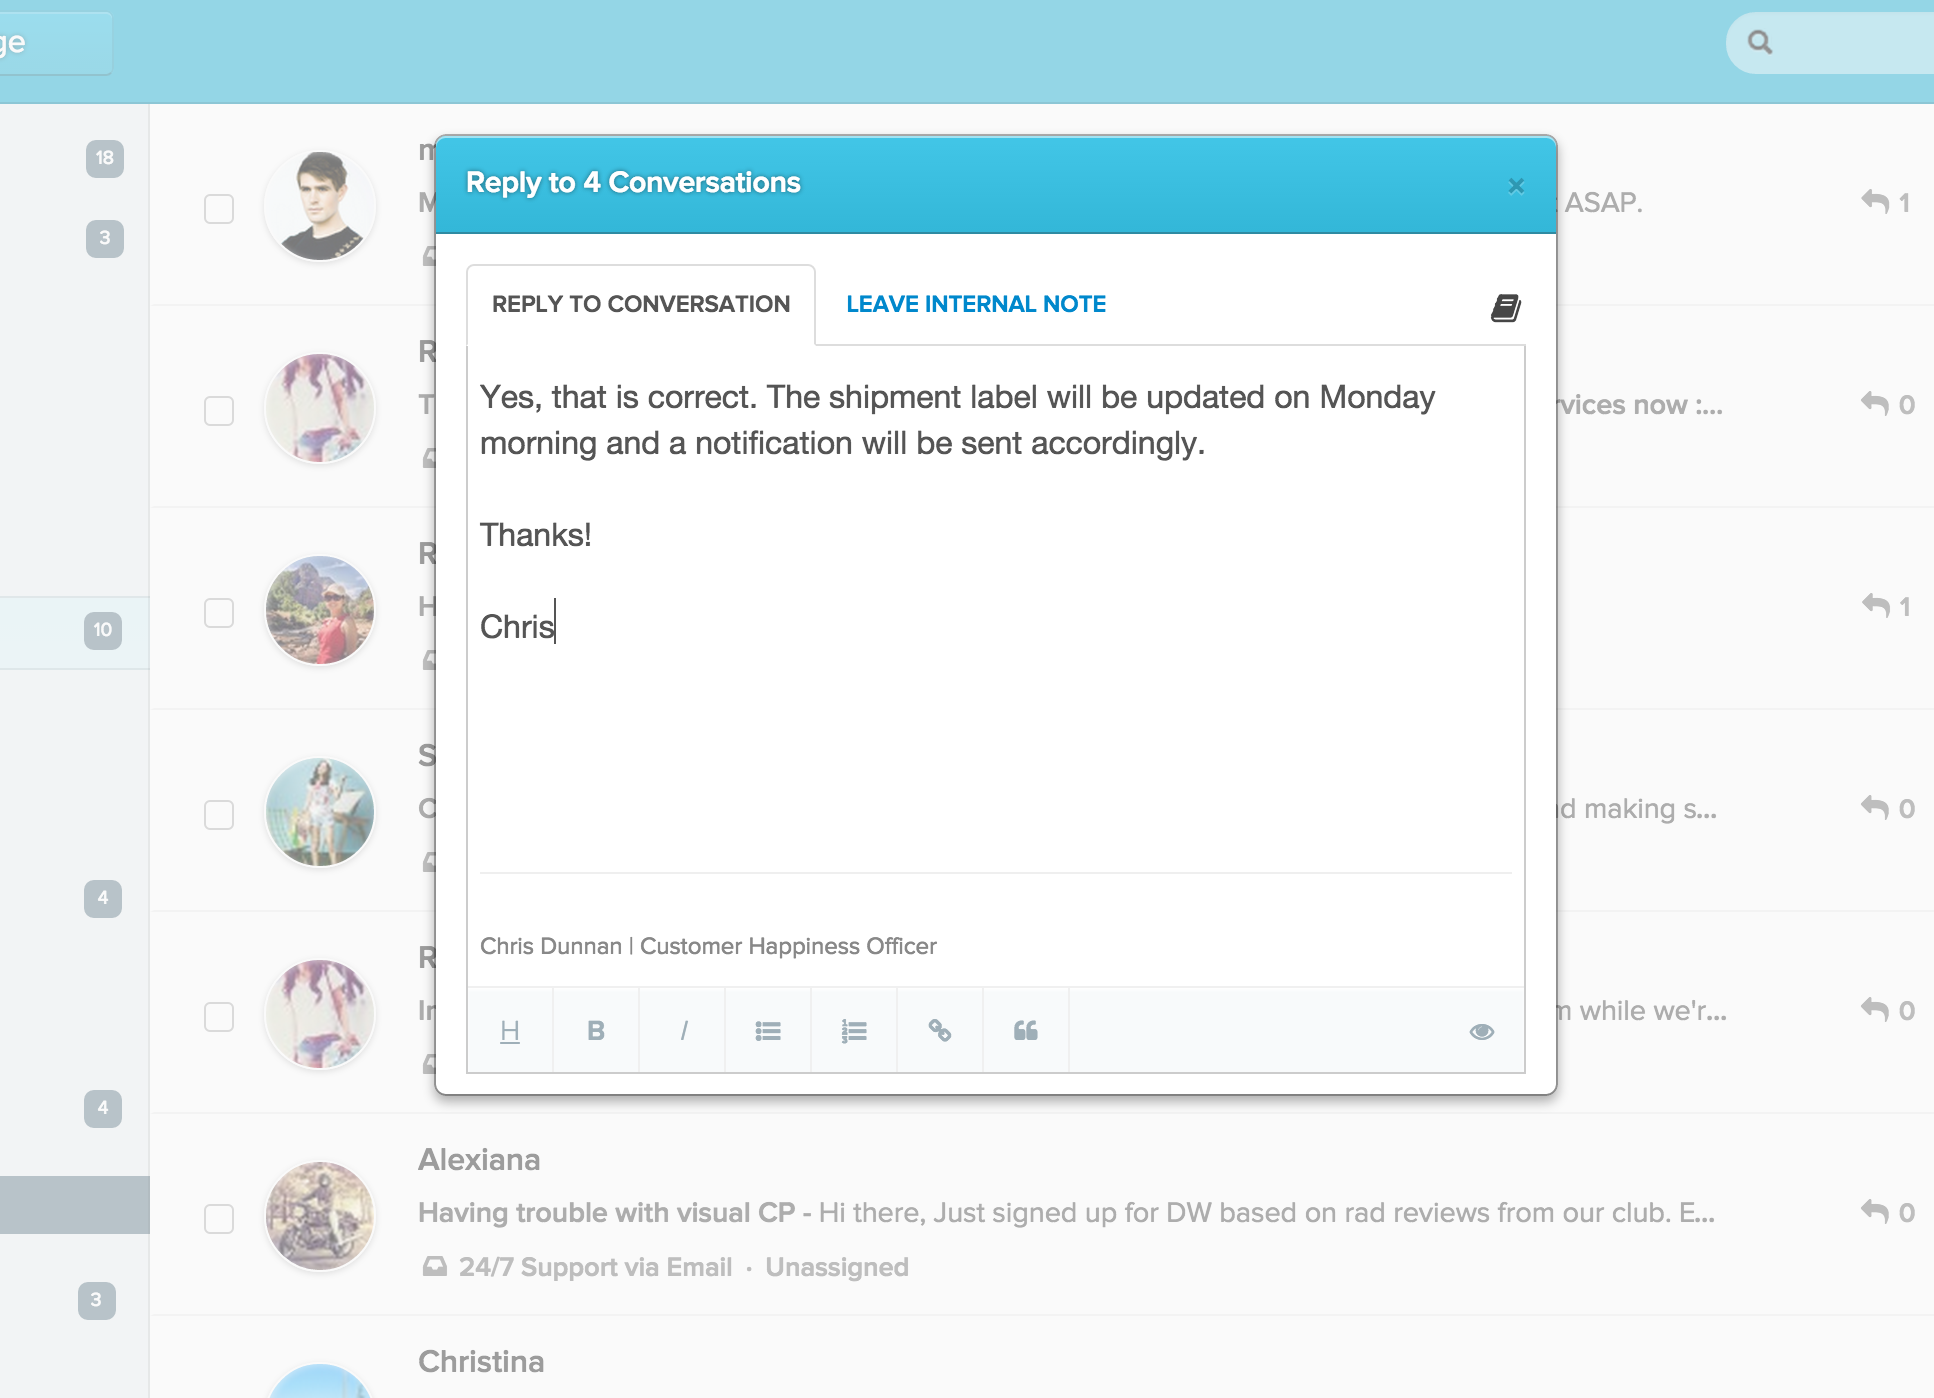
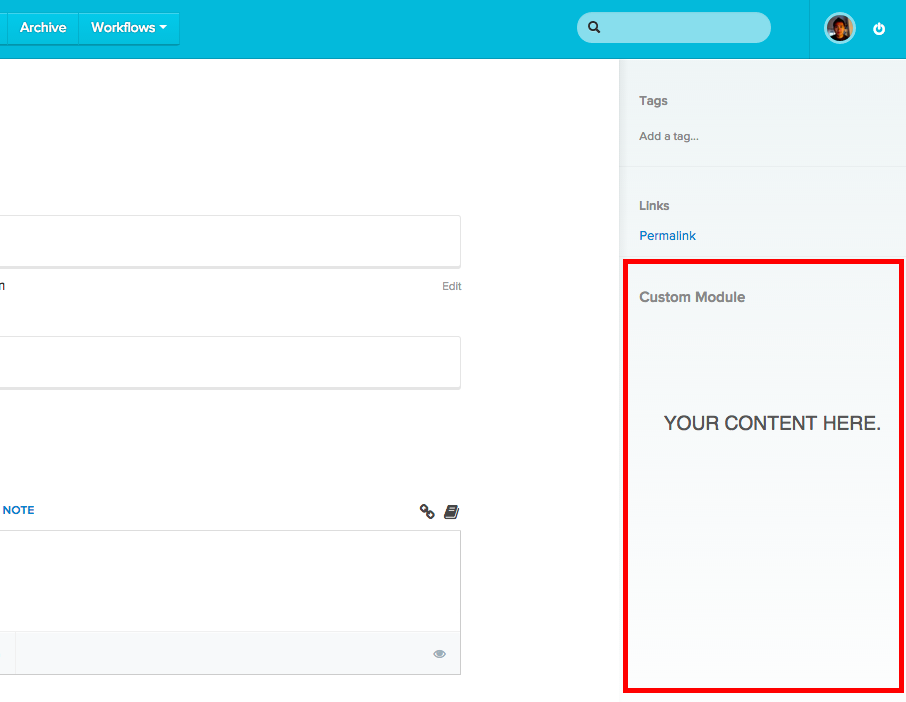
Our design team even volunteered over 78 hours after work to create a beautiful template capable of supporting this new implementation. Careful positioning of the “Please type your reply above this line” message were thoroughly A/B tested to achieve the highest non-reply rate.
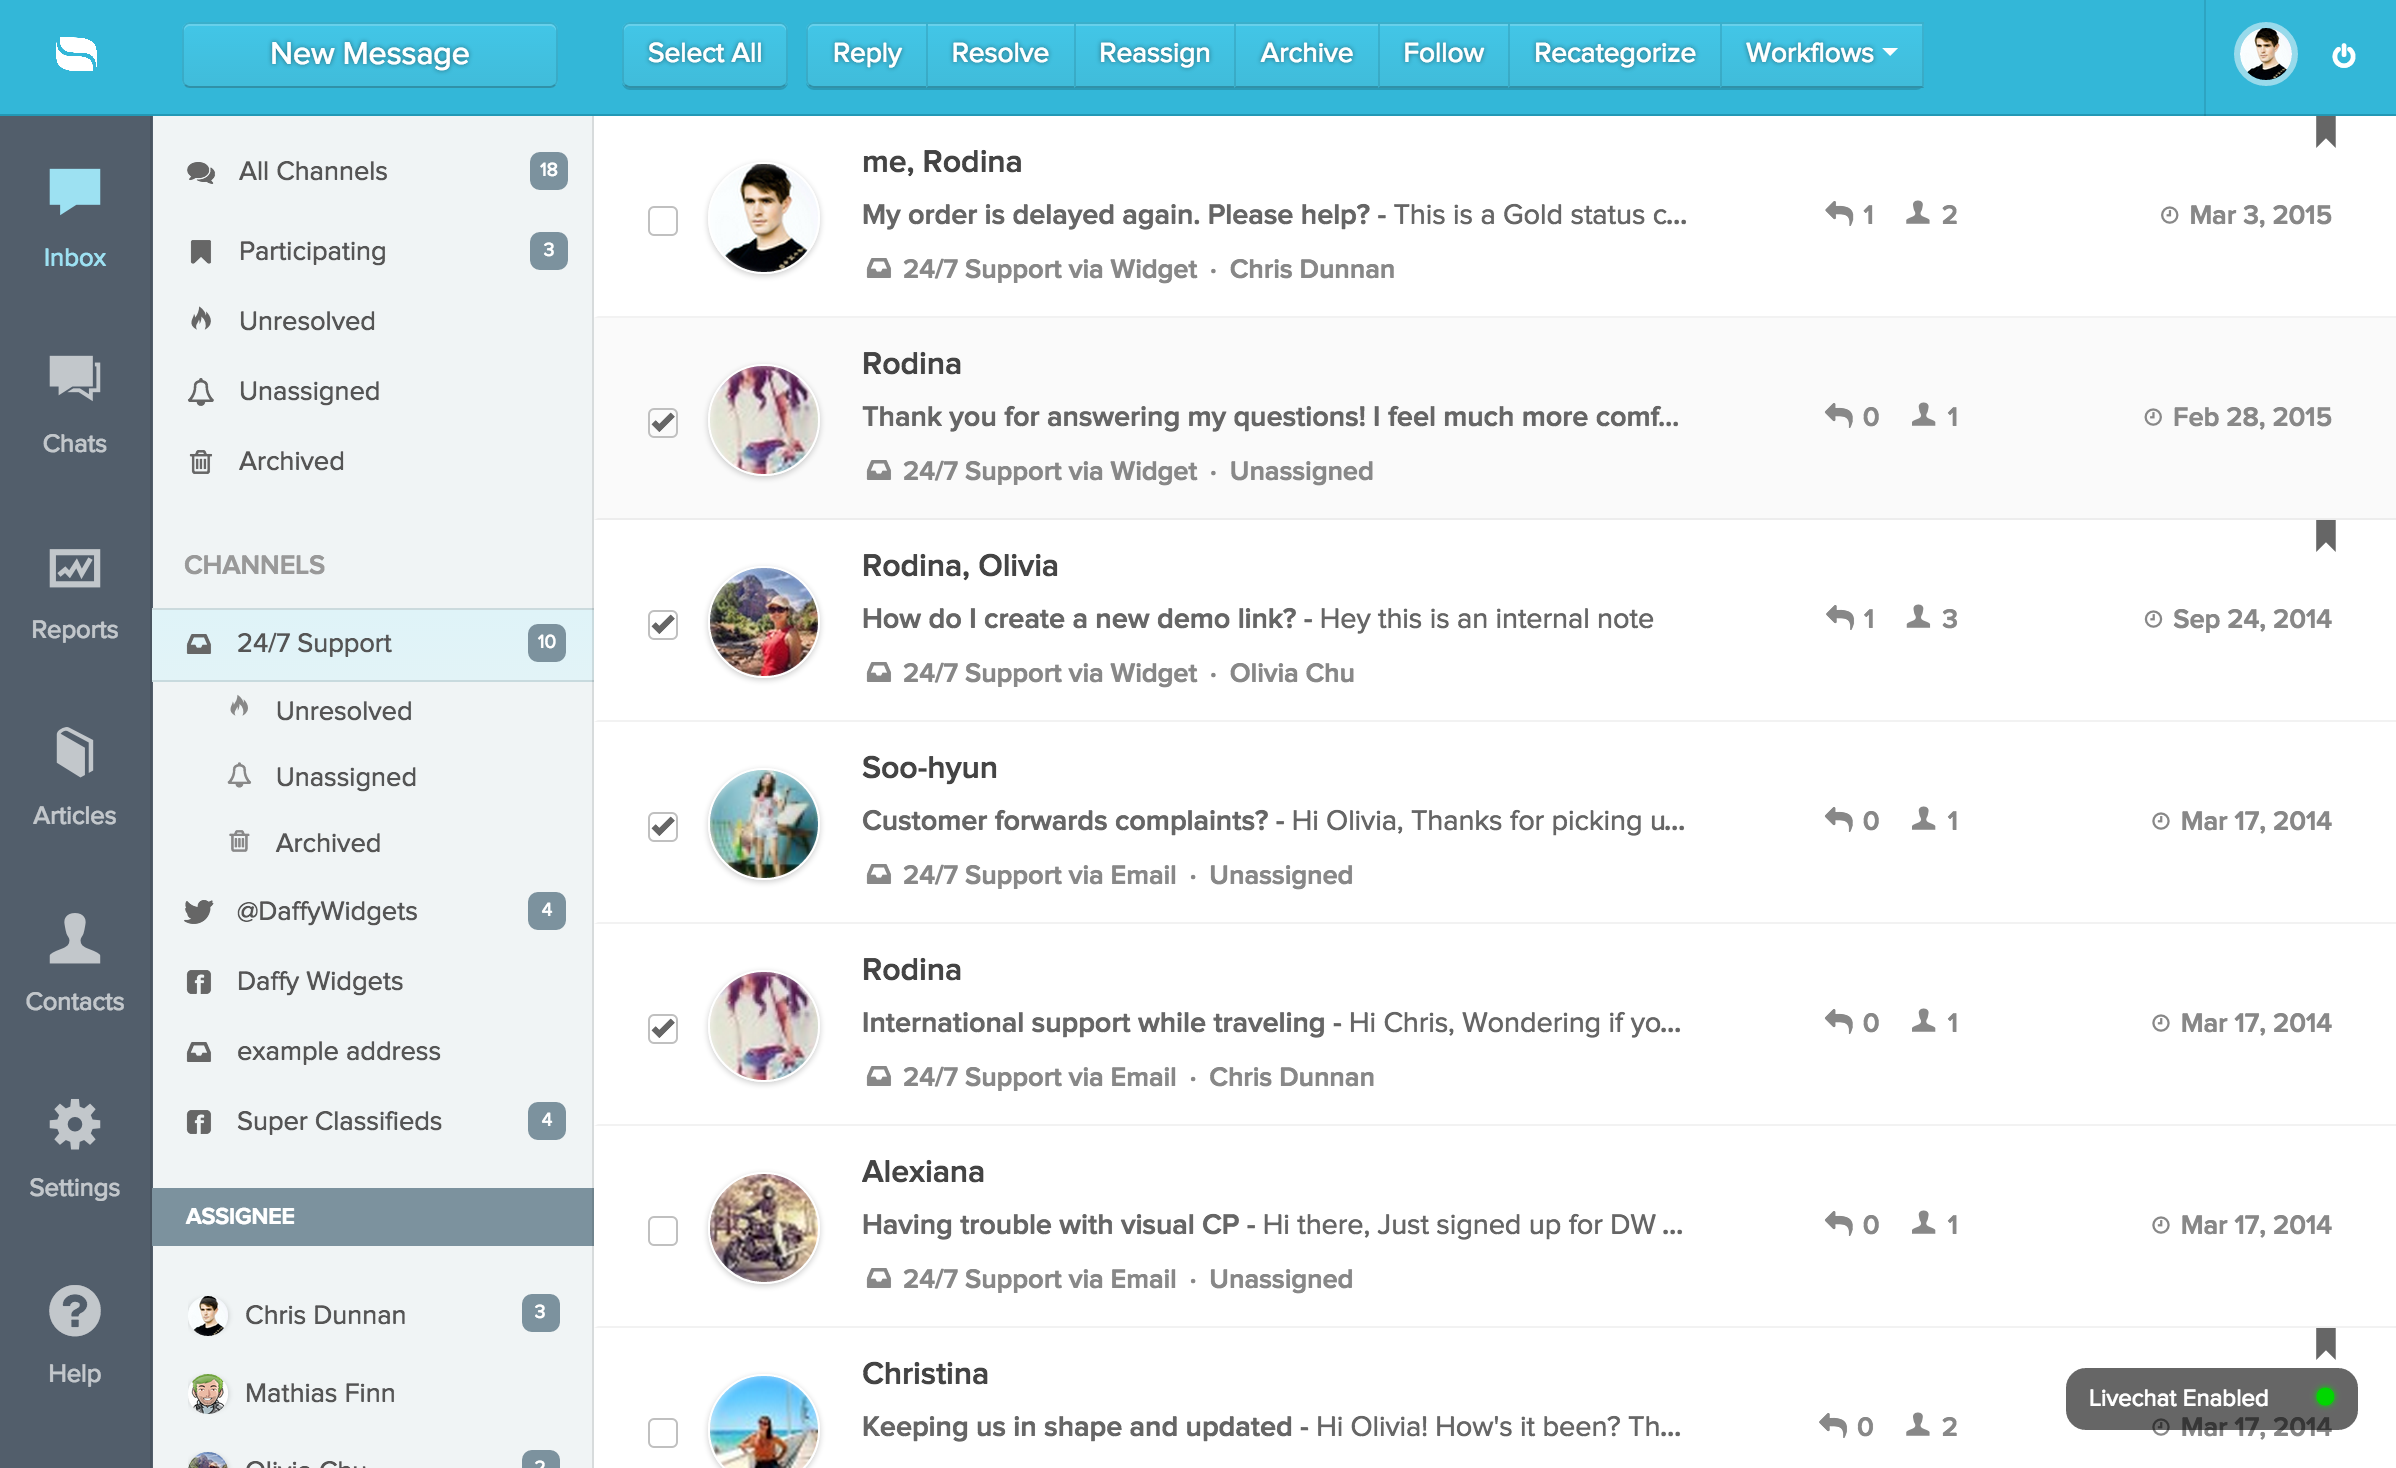
Our new hotness

Unfortunately, due to the Enterprise nature of this new feature, we will only be making it available in our custom paid plan.

Up next: Ticket Numbers!

Happy April Fools Day :)

Reamaze Recipe: Transitioning From Zendesk to Reamaze

$
0
0

The question we get asked almost on a daily basis is: “How do I transition over from Zendesk without doing a massive import?” and “How do I test Reamaze out while keeping all my tickets in Zendesk?”

When we answer this question, we always make sure to tell the customer first and foremost that we DO NOT deal with tickets. We do not deal with “Please reply above this line”. We don’t deal with robots. After a small rant on what we believe customer support should be, ahem, conversations with customers, we usually tell them to give Zapier a try. Zapier allows you to connect some of your favorite productivity tools across the web using a simple interface so you don’t have to toy around with multiple APIs.

We’ve been pals with Zapier from across the street for years now. If you have Zendesk account and a Reamaze account, all you need to do is head on over to www.zapier.com and create another account there. Once you’re in Zapier, click on “Make a Zap” to start connecting the two accounts.

Select Zendesk from the left for when a new ticket arrives and select Reamaze on the right to create a new conversation when that new ticket arrives in Zendesk. Zapier will walk you through the connection with relative ease. Do let us know if you run into any snags here (click on the help button down at the lower right hand corner).

When you’re done connecting, things should look like this:

Here comes the slightly more complicated part. You need to create a filter in your Zendesk account in the form of a “View” and set that as a trigger event for Zapier. This will let Zapier know when to find a ticket and when to tell Reamaze to create a conversation. In this example, we created a view called “Zap View”.

In Zendesk, you’ll be able to create a “View” by going to your settings page. When you add a new view, try what we’re doing here. This sets up the view so the trigger event is when the ticket status is open. This is applicable to all new, incoming zendesk tickets.

Also, remember to change the “Order by” to “Request Date” in desending order. This will ensure Zendesk send over tickets in the same order as they will be displayed in Reamaze.

Once that’s done, go back Zapier and start connecting the dots. Your “Category slug” should just be your Reamaze email channel’s name before the “@” symbol. For us, it is 24/7 Support. Clicking on the dropdown will be the easiest way to find this. The subject should be the “Subject” in Zendesk. The message body should match to “Last Comment Body” in Zendesk. The name of the customer should match to the “Requester Name” in Zendesk. Lastly, the email of the customer should match to the “Requester Email” field in Zendesk.

In the second to last step, if you connected everything correctly, you’ll be able to send a few test emails to confirm everything is working. Using a separate email address, send a test email to your Zendesk address, open Reamaze and see if that message arrives. Alternatively, you can use Zapier’s tests to confirm success.

And last but not least, simply turn on the Zap by clicking on the “Make Zap Live” button. Remember, you will need a paid Zendesk account in order to do this. Free trials and some Zendesk accounts may not support Zapier integration.

Well, that’s pretty much it folks. After this is done, you’ll be able to test Reamaze to your heart’s content without compromising what you have inside Zendesk. Truth be told, you’ll probably want to leave Zendesk after trying out Reamaze. But don’t take our word for it, try it out yourself!

Feature Update: Bulk Reply

$
0
0

Four customers asking you the same questions? Response templates not fast enough? Workflows is too overkill? Fear not! Bulk replies is now available to help you navigate these one-off situations where you need to fire off a reply to multiple conversations.

We’re pretty excited to announce bulk replies not only because it makes sense for a variety of workflows but also because so many of our loyal users have been requesting it. Simply go to your dashboard, tick the conversations you want to reply to and hit “Reply”. A modal will pop up indicating how many conversations you’re replying to.

As with all new Reamaze features we’re constantly improving things as we go along so please don’t hesitate to shout if something isn’t working or if anything doens’t make sense!

Multi-Brand Multi-Store for Shopify

$
0
0

Released in response to popular demand: Multi-Store support for Shopify! If you run multiple sites and stores via Shopify and have enabled Mult-Brand within your Reamaze account, you can now connect your stores to your brands and manage everything in one convenient dashboard!

Make sure you’re logged into your Reamaze account, go to “Settings” and make sure you’ve added the corresponding brands for your Shopify stores. After confirming everything is set up, go to “Apps” and connect your store. Or, if you already have a store connected, simply click on the “Connect another store” link. Simply log into one of your Shopify accounts and complete the connection. Alternatively, you can log into one of your Shopify stores and add the Reamaze app there. Just make sure you log into your Reamaze account to complete the connection.

Multi-Store support for Shopify greatly expands Reamaze’s Multi-Brand functionalities by bringing together conversations across multiple storefronts, minimizing time and resources needed to manage customer service “processes” so you can focus on building those amazing customer experiences and interactions. Best of all, your favorite Reamaze widgets, Live Chat, and social channels will be seamlessly connected :)

Please let us know what you think at support@reamaze.com!

Multi-Brand Multi-Store for Bigcommerce

$
0
0

Yup. You read our minds. Or, rather, you read ours. Multi-Store support is also now available for Bigcommerce. This feature works the exact same as Shopify where you can  synchronize customer messages coming from multiple store brands to one Reamaze account.

Make sure you’re logged into your Reamaze account, go to “Settings” and make sure you’ve added the corresponding brands for your Bigcommerce stores. After confirming everything is set up, go to “Apps” and connect your store. Or, if you already have a store connected, simply click on the “Connect another store” link. Simply log into one of your Bigcommerce accounts and complete the connection. Alternatively, you can log into one of your Bigcommerce stores and add the Reamaze app there. Just make sure you log into your Reamaze account to complete the connection.

Multi-Store support for Bigcommerce greatly expands Reamaze’s Multi-Brand functionalities by bringing together conversations across multiple storefronts, minimizing time and resources needed to manage customer service “processes” so you can focus on building those amazing customer experiences and interactions. Best of all, your favorite Reamaze widgets, Live Chat, and social channels will be seamlessly connected.

Enjoy!

New Conversation Navigation

$
0
0

We’ve made some functional improvements to navigating between conversations! Instead of replying to a conversation, going back to the dashboard, and then clicking on the next/previous one, you’re now able to easily click on two buttons to navigate to either the previous conversation or the next conversation in the list. The navigation buttons also work for all views and filters We hope you’ll appreciate the few seconds shaved off your workflow!

The two Next/Previous buttons replace the old “Back” button. Look for them at the top left hand corner. If you still wish to use a “Back” button we recommend using your browser’s native back button.

Introducing Stripe for Reamaze

$
0
0

If you’ve ever been frustrated with accepting payments and processing subscriptions as an online business then you’ve heard of Stripe. Stripe’s full stack payments features, developer friendly nature, and ultra flexible payments/checkouts platform can be said to have changed the playing field for eCommerce.

Today, we’re excited to announce the addition of Stripe to Reamaze’s growing apps family. With a few simple clicks, you’ll be able to synchronize your Stripe customer database with Reamaze’s CRM features. Upon integration, you’ll be able to view the following customer information seamlessly during a customer conversation provided they use a matching email in both Reamaze and Stripe.

  • View customer detail
  • View latest customer charge
  • View all charges
  • View each charge’s details
  • Process refund for a charge
  • View most recent subscription
  • View all subscriptions
  • Cancel subscriptions

Follow the steps below to get started!

Step 1: Go to “Settings”, click on “Apps”, and select “Stripe”

Step 2: Connect with Stripe

Step 3: Authorize and Authenticate

Step 4: Confirm Connection

Step 5: Customer’s Stripe information is available seamlessly

Step 6: Canceling a subscription

Step 7: Processing a refund

Step 8: Viewing payment history

– – – – –

PS. Stripe was an invaluable contributor to Reamaze’s first book on customer support. You can still get the first book here.

The 4 Pillars of Customer Success

$
0
0

We’ve emphasized many times in the past that good customer service, or good service in general, is not just about replying to questions quickly. Ultimately, your success depends on your customers’ success. And your customers’ success depends on the healthy ecosystems you’ve created for them to express their thoughts and validate their achievements. Our friend Quinn over at Kit CRM tends to agree. The following is a guest post from Quinn and how their team looks at customer success.

- – – – -

What does it really take to make a customer successful? At Kit, it is the most important question we ask ourselves every day. First, you must define what success means to your ideal customer. Is it making their first sale using the advertising solution you built to help small business owners succeed? Is it a 5x increase in conversions because the companies who use your service can now chat live with inbound leads? Is it growing their marketing list by 200% because they added your capture form on exit? Your product only has the chance to truly matter and truly be great if your customers are meeting their business objectives. In this post I want to touch on what I believe to be four pillars of a successful customer: engagement, education, milestones, and goals.

Is your customer using your product and what are you doing to make sure they are engaged? Keep them involved and make it a delightful experience, think Slack. In addition to making sure it is delightful, ensure that your company’s personality permeates the product. Part of this is recognizing that there are going to be pain points. Having an engaged customer is inevitably going to result in frustration at points and the more engaged they are earlier on, the faster you can solve those issues for future customers. Engagement should be conversational, and the best product always are. Pull information out of your customer to help them improve their own user experience, you should never carry the full weight on your shoulders. Turn rote and arduous tasks into enjoyable ones. Delightful.

As people are engaging with your product you should be simultaneously educating them. Knowing what to do, how to do it, and when to do it is critical for the success of your customer. Give them the necessary signals to guide them down the right path, you are air traffic control. In that same vein, put as much as you can under the hood while exposing the right amount of information. Finding this balance can be hard but will pay off in the long run. Test different education flows with different cohorts and find what methods work best for your customer base.

Following the path to LTV-approaching-infinity, there are going to be milestones your customers need to hit. Make sure to reward each of these goals and drive users forward towards the next one. Did they run their first ad? Great! What will make them run the next ten? Positive reinforcement and signaling are critical to the growth and success of your customers and product. Milestones need to matter. Logging in three times is not a milestones. Closing three tickets per log in is though. Milestones are meaningful and should be tracked, displayed, and celebrated accordingly.

Engagement, education, and milestones all collectively contribute to customers hitting their goals. None of the above matter if they are not hitting their business objectives. Your funnel does not end when a customer converts, it goes much deeper than that. Goals = retention. The truly successful customer is the one you have engaged with, educated, helped hit all of their milestones, and seen their business grow because of you. Celebrate their success, and by extension, yours.

- – – – -

You can follow what Kit CRM is up to at https://www.kitcrm.com/.


The Reamaze Widget Builder

$
0
0

We’re constantly thinking about how to make things easier for you. That’s why, today, we’re introducing an ever-so-simple DIY builder for our beloved embeddable widgets. We understand that not all of you are code savvy. All that tweaking and trial and error can get ever so tedious. In some ways, it might have even prevented you from deploying a Reamaze Shoutbox, Lightbox, or Contact Form. Boy are you missing out!

That ends today! With the Widget Builder, you’ll make able to choose the options you want, customize the widget however you want, and we’ll cook up the code you need to paste into your site or app. Do you want the contact mode first or the KB first? Do you want the widget trigger to be blue instead of red? What about a custom dropdown? Everything is there! You can even email yourself the snippet right from Reamaze. How simple is that?

Step 1: Pick Your Widget

Pick either a contact form or a knowledge base and then the widget format. Do you want a Shoutbox that sits in a fixed position that is deployed via a trigger icon. Or do you want a Lightbox that can be embedded into any of your existing site/app element? You can also choose the last option so that it’s embedded in between site/app content.

Contact Form

Knowledge Base

Step 2: Customize Your Widget Appearance

In this example of a Shoutbox, you can change the location, color, style, and size of the trigger icon.

Step 3: Customize Your Widget Options

If you pick the contact form, you can choose to add custom dropdown lists that will provide your customers with more choices. The customers’ dropdown menu selection will be populated along with their customer data when agents look at the conversation.

Step 4: Get Code Snippet and Done!

When you’re done, simply copy and paste the code we cooked up right into your site/app. If you want to do it later, simply have the code emailed to you!

Make sure you check out the new Widget Building located right in your settings menu. You can now build your very own Reamaze widget in a matter of minutes! Now there’s no excuse to not skip out on our embeddable widgets =)

How To Express Yourself In Multi-Channel Support

$
0
0

Old-school customer service is almost always about the call center. Call centers focus on certain efficiencies that diminish the loss of value to the bottom line of a business. Agents are trained to listen, interpret, and speak in a certain way to cater to those efficiencies. Those efficiencies are often processes designed to make it nearly impossible for customers to truly interact with a business.

Whereas customer service skill sets over the phone can be trained, tweaked, and “designed” to resolve issues in one go, multi-channel customer service based on email, social media, and live chat require a more delicate touch. Soft skills such as empathy are valued greatly in a modern-day customer support agent. However, not everyone you hire will possess those soft skills. Here are our recommendations for adding a dash of “soft skill” to every multi-channel agent.

  • Learn proper punctuation

Improper punctuation can significantly alter the meaning of sentences. Screen out candidates with poor writing skills. Younger candidates experienced in the world of social media still need understand the difference between your and you’re.

  • Shorter paragraphs mean more succinct answers

There’s nothing worse reading a novella when you’re just looking looking for a simple answer. Train your agents to reply more succinctly by keeping things short and to the point. Shorter paragraphs also make it easier for your customers to consume new information.

  • Use emoticons

You can seriously offend someone from another culture if you use the exclamation mark a little to liberally. No one will be offended by smiley faces, however. When customers can’t hear your voice online you need to over-express your ethusiasm, energy, and gratitude.

  • End conversations with a question

Customers need to understand that you don’t find them annoying and that you love having a conversation with them. I love to ask customers questions toward the end of the conversation just to get them to write back. Trust is best built over a good candid conversation. Email and social media works well for this.

  • Always (more often than not) have the last word

Some will say this is overdoing it and some may be right. It’s not required 100% of the time but always try to get have the last word. If customers say “Thank you so much!”, the conversation actually ends when you say “You’re very welcome!”. This is very easy to accomplish in multi-channel support.

  • Don’t be too proper

You still need to learn proper punctuation but you don’t need to be super proper in multi-channel support. Formality makes the conversation feel stale and one sided. Are you super formal with your close friends? Didn’t think so.

Reamaze Custom Module

$
0
0

Reamaze Custom Module has been available to select partners for a short while now. Today we’re happy to announce that it will be publicly available through our developer portal! The iFrame-based Custom Module gives you the ability to add any dynamic web content you want to ther conversation view’s right rail.

For example, you may develop your own app that retrieves a customer’s shipping information, host it in a location of your choosing, and trigger it right inside your Reamaze conversation with that particular customer. This means, that in addition to the wide variety of 3rd party integrations we provide, the custom module opens up whole new possibilities!

The Custom Module works via an iFrame to a URL that you can specify, which can serve up any web content desired. Reamaze will provide contextual data to the specified URL so that you can display contextually sensitive data and actions.

If you interested in learning how to build a Custom Module, check out our documentation here: https://www.reamaze.com/developer/module

Channel Signatures & Awaiting Status

$
0
0

Awaiting Status

The new “Awaiting” status filter replaces what used to be called “Unresolved”. The original logic behind “Unresolved” simply pulled conversations that were unassigned. The new “Awaiting” status pulls not only unresolved conversation awaiting an agent to reply but also pulls new messages in an existing conversation where an agent is already assigned. This is far more useful for typical workflows where there are large volumes of conversations. This filter is now available right from your dashboard.

Channel Signatures

In response to popular demand, we’ve added an account-wide, channel (email) based, signature field. If you have multiple agents operating through multiple channels this can be extremely helpful in unifying the various branches of your business. Channel signatures are applied below a staff’s individual signature. To add a channel signature click on “Settings” and then “Channels”. Pick an email channel and scroll down to Channel Signature.

Adding New Email Channels Just Got Easier

$
0
0

Adding new email channels, setting up forward, checking for confirmation, and testing everything yourself can get so tedious, right? Fret no more! We’ve just release the Reamaze Email Verifier out to the wild. The verifier makes adding and confirming your email forwarding setup with extreme ease. We do the heavy lifting so you can focus on just getting it done.

When you choose to forward your email address to a Reamaze address, all you need to do is enter it in the required field, set up the actual forwarding in your email service, and Reamaze will send an automated email for verification.

Step 1

Click on the “Connect to my email address” button.

Step 2

Enter your regular support address. This should be the address where you wish customers to contact you.

Step 3

At this point, you’ll want to head on over to your email service of choice and set up forwarding to your Reamaze channel address.

Step 4

Once you’ve confirmed the forwarding process, click next and Reamaze will verify that everything is ship shape. If you’re using Gmail, you’ll receive a confirmation code in your Reamaze dashboard. Copy it and paste it into Gmail to confirm.

Enjoy!


Reamaze for WordPress!

$
0
0

Gasp! Do you notice something different about the Reamaze blog? Look at the bottom right hand corner and you’ll see the very familiar Reamaze Shoutbox Widget. That’s right! Reamaze Embeddables are now officially available for any WordPress powered site.

As one of the most recognized and widely used blogging and site platform in the world, WordPress has always been a top candidate for a Reamaze integration. With close to 40,000 different plugins available to developers we’re super excited to be able to offer a unique and embedded helpdesk/Live Chat for your blog or site.

The plugin is officially available as of today and we’ve already gone ahead with an update for some performance improvements. If you have a Reamaze account and run a WordPress blog/site of any sort, this is a must have integration! Take a look at the plugin listing here: https://wordpress.org/plugins/reamaze/.

Just to make things a bit easier, let’s do a quick dive into how to set this up.

Step 1

Log into your WordPress dashboard and look for the Plugins menu. Click to add a new plugin.

When you see the plugins directory, go ahead and do a search for “Reamaze”. When the Reamaze listing comes up, simply click to install.

Once installed, you’ll need to click on the “Activate Plugin” link at the bottom of the confirmation.

Step 2

Once your Reamaze plugin has been activated you can go ahead and connect it to your Reamaze account. Go ahead and click on “Settings” under your Reamaze plugin to bring up the brand identification uplink as well as the prompt for your Secret SSO Key. The Reamaze Account ID is your Reamaze subdomain name and your key can be found in your Reamaze dashboard under “Settings” and then “Account IDs and Secrets”.

Step 3

The Reamaze plugin actually allows you to create conversation inside your Reamaze dashboard by converting comments. This is extremely handy if you use your WordPress powered site for most customer interactions. To do this, you’ll also need to enter your Reamaze login email. Just make sure you’re using the same email login for your Reamaze account as your WordPress login. This part is crucial. The Reamaze API key is found in your Reamaze dashboard under “Settings” and then the last option called “API Token”.

Step 4

At this point you can go ahead and save your changes and refresh your site to confirm the integration. You should see the standard Lightbox Widget deployed on your site!

Now you’re probably wondering, how do I customize the Widget trigger? Easy! Head on over to the Widget Builder under the “Settings” menu in your Reamaze dashboard. Build the trigger and Shoutbox elements to your specifications and copy the snippet. Then paste the snippet into the following section in WordPress:

Step 5

Lastly, let’s take a look at how to create conversations from comments. Head on over to your comments box, hover over an active comment and you’ll see the option to “Create Reamaze Conversation”.

In this test comment above, you can create the conversation under a specific brand, reply, reply on WordPress, and even leave an internal note automatically for another team member or as a reminder.

– – – – –

So what do you think? Please take this out for a spin and let us know of any feedback or concerns at support@reamaze.com.


Updates for August!

$
0
0

Staff Report Export

The Staff Response Volume report which shows each indivdual staff’s general performance, appreciations, and response times is now exportable to a convenient CSV file!

Suppressing Notifications for Conversation via API

Issuing a POST call to conversations will allow you to create new conversations on behalf of a customer. You can now optionally pass in a “message[suppress_notification]” boolean attribute with a value of true to prevent Reamaze from sending any email (or integration) notifications related to this message.

Reply with Staff Name

You now have the option to pick what name your customer sees when they receive a reply from you or your team. Simply go to “Settings”, “Channels”, and then pick between “Reply with Channel Name” such as Support or “Reply with Staff Name” like John Smith.

Edit Subject Line

Sometimes customers can write in with such generic subject lines like “Hello”. We want you to be able to change that subject lines for easier tracking and organizing. To edit the subject line


Knowledge Base (KB) Tooltip

$
0
0

The Reamaze Lightbox Widget is getting updated with a new feature today! The KB Tooltip embedded widget is now LIVE from our developer docs. Take a look here: https://www.reamaze.com/developer/widget_lightbox_kb#article.

The KB Tooltip allows you to deploy a lightbox popup on any specific site element. The popup will then trigger a specific KB articles you have preselected. This is great for building guides, tutorials, and proactive onboarding processes. If there’s something customers are always getting confused about you can launch a KB article preemptively.

For example, click HERE to check out a KB Tooltip about the Widget Builder.

Reamaze Video Tutorial Series

$
0
0

If you haven’t already noticed we recently started uploading video tutorials to YouTube in order to help our customers learn more about some of Reamaze’s features. We will continue releasing guided tours on a weekly or bi-weekly basis. We have 3 videos up so far and you can check them out by clicking here.

Here’s what we have so far!

If you have any suggestions for videos or specific topics you’d like us to cover please send us an email at support@reamaze.com!

How to Reamaze: Shopify (Video Tutorial)

Updates for October!

$
0
0

Halloween is almost here! Yippee for candy!

We’ve introduced some new features into Reamaze in preparation for much bigger-better things to come. If you’ve been waiting for features like conversation reminders, you’ll be glad to hear that we’re making good progress toward that as well :)

Here are 3 new features for the month of October.

Logging Messages

The ability to log conversations has always been an important feature for Reamaze. The addition of this feature opens many interesting doors. If you recently had a phone conversation with a customer, you can now log that conversation under a specific channel, insert the customer’s email, and convert that into an email for an assigned staff agent to follow up. We hope you’ll find this useful!

Special Syntax for Internal Notes

Ever wanted to leave an internal note while on the go on your phone or email? Previously, internal notes could only be created while inside the Reamaze. Now you can simply open the conversation from your phone or browser’s email, CC the staff member you wish to leave the note for from your email, type “@note” (without quotations) in the beginning of your email, and continue typing the note. Hit send and Reamaze will automatically log an internal note in that conversation!

Workflows Enhancements

We’ve introduced a small update to the way Workflows behave inside Reamaze. Previously, workflows could only be triggered based on matching rules from the first incoming customer message. This essentially was your first line of defense for certain types of content.

Now, workflows can be triggered not just on the first incoming message but also any subsequent message in that conversation thread. That said, each workflow can only be triggered once within a given conversation. In addition, workflows now trigger based on conversation assignee as well as tags. Generally speaking this won’t affect how your workflows are set up today. No changes are necessary on your end. This update will only make Workflows a little bit better and more effective across your customer conversations.

Video Tutorial: Email Channels and Forwarding

$
0
0

If you’re new to Reamaze, your first support email channel is automatically created based on your subdomain. For example, support@yoursubdomain.reamaze.com. If you already have a support email address that you’d like to use for Reamaze, you’ll need to set up forwarding from that address to support@yoursubdomain.reamaze.com. To learn how to do that, we’ve prepared a quick video showing you how. Check it out below!

Viewing all 585 articles
Browse latest View live