Quantcast
Channel: Re:amaze Blog
Viewing all 585 articles
Browse latest View live

Reamaze Livechat

$
0
0

Reamaze Livechat has landed. Over the past few months we’ve been building out a brand new dimension of the Reamaze customer service experience: real time conversations with your customers. We’re super excited to be showing it off to you today.

Adding livechat to your business is a big deal. It’s an amazing sign of growth and the cornerstone of having a customer-centric service culture. Here at Reamaze, not only do we want to make that experience simple and integrated but we want to make sure your customers experience something seamless and intuitive. We’re applying all that we’ve learned to Reamaze Livechat so that it’s not just another feature but an extension to what you already love about Reamaze. For example, you can transition from Livechat to email with a click of a button and not lose any context of the conversation. This experience is even better for your customers.

Reamaze Livechat Features

  • Live dashboard and active notifications
  • One-touch on/off
  • Embedded Livechat via Reamaze.js
  • Typing status indication
  • Chat transcripts and permalinks
  • Custom user data
  • End-chat actions such as converting to email
  • Unavailability notification
  • And much more coming soon!

To find out more about Reamaze Livechat, please visit our getting started guide in our knowledge base located HERE.


Do You Have Any Questions For Us?

$
0
0

If you’ve ever conducted interviews or have ever been the subject of an interview then you know there is one question that always crops up toward the end. The employer will usually ask, “Do you have any other questions for us?” Our recommendation to all interviewees at this time is to always inquire about what the host company thinks about customer service. The answer can tell you a lot about the culture of a company and how that culture might influence your career many years down the road.

Most companies will probably say they value customers, that they take customer service seriously and customers always come first, or that they spend X number of hours training customer service agents. Other times, and only if you’re lucky, you might run into a reply that stands out from the rest. This is where you should pay attention. A few months ago while attending a dinner party hosted by an old college friend I had the opportunity to dust off the elevator pitch and start some conversations with strangers. At one point, I asked a startup from the Midwest about how they perceive customer service and how they plan on scaling operations. Here is a summary of their reply:

We try to be pretty innovative with customer service, meaning we try to navigate away from the old-school one-on-one customer interactions. At the end of the day, customer service is about staying ahead of problems. We do a lot of crowd-sourced customer service where we provide many different channels for customers to not only interact with us but with each other. We have a team of community evangelists that kinda moderate this environment. They basically act as a radar and sonar combo. This trains them to not just reply to problems but also trains them to listen and replicate how other community members are replying to certain problems. When we do need to reply, we will do so with short, direct, and precise answers so we can carve out more time to spend within the community. Even our CEO participates because it’s so much more fun. We’ve experimented quite a lot over the last few months and found that this not only saves a lot of time on actually replying to every inquiry but also on training and money. We don’t need to hire as many evangelists. The evangelists that we do have are also highly engaged because they’re part of a good community. This method has also allowed us to really pinpoint potential issues before they become real customer support problems. Moderators are really good sonars in this respect.

These guys are successful because they have a pretty awesome product. They’re also successful because they’ve spent time to think about customer service and what it means to build a loyal customer-driven community. It shows their culture, work ethic, and most importantly, it shows that they might be around for a long time because customers love them so much. So, if you’re on the line about whether or not you want to join a company, consider asking them about customer service. You just might be surprised about what you hear and possibly avoid working for a company that receives these:

Do You Even API, Bro?

$
0
0

These guys most certainly do.

We love the peeps over at Idea Bits and their awesome products. Taking advantage of Reamaze’s API has allowed Idea Bits and their various properties to have complete control over their workflow in order to serve customers better. The Reamaze API truly allows you to go beyond what is already offered through our off-the-shelf integrations like the widgets for support and Livechat, embedded knowledge base, or embedded contact forms. The Reamaze API gives you deeper and more integrated access to your customer service data.

Idea Bits’ dynamic dashboard shows the number of unresolved issues by time across their brands. Green indicates less than 24-hours, yellow for more than 24-hours, and red for more than 48-hours. On the right are individual employee accounts that they route through Reamaze to track the same data. Idea Bits has also made it a priority to showcase this dashboard on a huge monitor in front of all their customer service employees.

If you have a great implementation of our API, we’d love to see it! We’ll make it a running series where we feature some of the latest and best configurations. And as always, we welcome feedback on our API and ideas on how to improve it. As of today, you can already to a great deal:

If you’re interested in some of Idea Bits’ products, feel free to check them out here:

Printful

StartupVitamins

Behappy.me

Gamifying Your Support Team!

$
0
0

Hey Reamazers. Today is a good day to be calling y’all Reamazers especially because we’ve just added some new and awesome meta features into staff reports. This is actually a joint effort between some of our power users and a little competition we’ve been having at the office.

It all started back in September 2014 when Pat started talking smack. Said smack was so outlandishly baffling that me, Marvin, and Mathias that we eventually ended up ignoring Pat for a good 2 weeks! We kid. But in all seriousness, Pat did stumble upon something interesting. We were subconsciously competing on who had the most appreciations from customers… Although some us reply more, we’ve noticed that more responses doesn’t always equate to appreciated responses.

Over the past few weeks, we decided to add in some more meta data into staff reports so we ourselves could have more visibility into our competitors. For example, we added:

and

We’re still crunching through some of our game stats but I’ll be the first one to claim that my speediness is more of a winning variable than Pat’s weak-sauce 12.5-hour average response time. Smack!

If you’re interested in having a little friendly competition, feel free to try what we’re doing and gamify your customer support team! Keep a whiteboard score or something :)

Gamify


All Your Customers Are Belong To You, Actually.

$
0
0

10:00 AM.

Monday Morning.

I receive a message from a friend asking me about what the Gold level membership for a popular travel website actually gets you. I reply enthusiastically that the gold level get’s you access to early deals and better service. I am a gold member after all.

A few minutes go by and he replies:

Oh meh… looks kinda worthless. Basically means ‘oh now we will treat you like a customer’.

It struck me hard. He was right. A lot of businesses actually do this. They sell customer support, the illusion of good service, and the potential availability of weekend support as a premium benefit. We’ve been conditioned by the technology gap so much that being treated like a customer is somehow now a thing reserved for the “Souper Elite”.

Everything from online shopping, to airline frequent flyer programs, to car services at a dealership, and to whatever else you can think of are all moving to this  ”privileged” customer model. Where does that leave their “other” customers? You may genuinely believe the answer to be very complicated. And why not? Big spends on analytics and big data have told you empirically that those customers are NOT worth your time, effort, and “service”.

It certainly is a good question that we ourselves don’t actually have an answer to. All we know is this – All your customers actually belong to you. We listen and support everyone because even the one-man band out in the burbs of Bakersfield can give us an insight worth a million dollars.

Elite

Interview With Brightpod

$
0
0

Brightpod is a web-based project management and time tracking software for digital creative teams. They interviewed us this week and we want to share some of what we said:

-

This week we feature Marvin Strauss, Customer Experience Guru at Reamaze. Reamaze is lightweight customer support software developed for small businesses.

In this interview, you can read more about his work at Reamaze, favorite marketing tools, productivity tips as well as his advice for budding marketers.


Your location: San Jose, California

Your favorite gadget:  Breitling Transocean (yes it’s a gadget)

You start your day with:  Raisin bran with vanilla soymilk

Your favorite time-saving trick: Ignore shit

Your top 3 blogs you read daily:  Anything on Medium. Signal v. Noise. Hondinkee.com because we’re all watch lovers.


“ We see customer service as opportunities to engage both current users and potential users. ”

Describe an average day at Reamaze?

I don’t think we really have an “average” day. Running a small team has its ups and downs but we focus our heads together when we need to and have fun when we want. We interact a lot with our customers during the day so a lot of our internal activities are spent on either building and shipping new things for customers, enhancing existing customer experiences, and/or fixing customers’ issues by internalizing their feedback. I guess you can call us a startup in that we’re young, energetic, small, and adequately funded, but there really isn’t a truly average day =).

As a marketer, what is your favorite productivity hack?

We use our own product! It’s a productivity hack in so many ways. In addition, we focus on three pretty simple productivity mantras.

1. Focus on the right things to work on and no wasting time on the wrong things.
2. Clear ownership is crucial. Too many stakeholders leads to “committee”, which leads to a lot of lost productivity.
3. Change a lot. What is productive now won’t last forever because everyone else catches on.

As a person who is well-versed with online marketing/ inbound, I’m sure you rely on a few marketing tools to automate your efforts. What are the top 3 tools you use?

We’ve always been big believers in earning customers rather than buying customers. Content marketing is pretty big for us and we use a variety of tools to reach out respective audiences. We rely heavily on our own blog for content distribution such as eBooks and infographics, HackerNews, Reddit, Facebook, Twitter, and the whole shebang. More recently we’ve been testing out some new homegrown beta tools for this purpose.

Your company has a growing community of users. How do you use this treasure trove of customer insight to power your marketing efforts?

A few very early beta users of Reamaze know us for our business intelligence background. Very early versions of Reamaze showcased some of our segmentation, cohort analytics, and action-driven outbound messaging capabilities. We would tell you why we eventually decided to build customer support first but that’s another story entirely. The point is, much of what we do in marketing, targeting, and delivering the right features to the right customers is deeply rooted in our ability to understand our growing community of users. The conversations we have with customers is pure gold. And oh, word of mouth helps too!

What is your strategy for getting people to your site and then converting them to a customer?

A relentless attention to customer service. Most companies see customer service as a cost center, an entity within the “business” to minimize complaints. We see customer service as opportunities to engage both current users and potential users. It’s really no big secret… We just talk to them. At the end of the day, you need a great product but beyond that, it’s about getting users to believe in your vision. We also focus a lot on talking to specific niches of users. Developers are different from e-tailers so its important to know the right buttons to press in order to convert them.

Is there any advice you’d like to give to budding marketers to help them work smart and stay productive?

Every team is different and I doubt any single advice will be a one-size-fits-all. That said, I would advise startup teams to keep things simple. There’s nothing worse than spinning wheels for the sake of spinning wheels. Be creative and stop ogling at what other startups are doing to be successful. Brave your own path and execute on what works for you.


A big thanks to Marvin for taking the time out to answer these questions! If you haven’t already, I highly recommend that you check out Reamaze.


Rails Gem and Django Package for Reamaze

$
0
0

As part of our ongoing efforts to make our integration capabilities easier to leverage for developers, we’ve now made our Reamaze Rails Gem and Django package LIVE to the public! This is an easier way to integrate Reamaze.js (particularly the SSO part) for Rails users.

If you’re not running Reamaze on your Rails site, there’s no excuse anymore =) The gem makes it dead easy to integrate our widget and take advantage of goodies like Livechat. We now also offer a Django package so developers of either Rails or Django projects can get juicy-delicious with Reamaze via just a few lines of code.

So stop running around, have a seat on your comfy couch, and head on over to:

Reamaze Gem

https://github.com/reamaze/reamaze-gem - Rails engine for integrating a fully functional support system into your web site or app.

gem

Reamaze Django

https://github.com/reamaze/reamaze-django - The simplest way to add a fully integrated support experience to your Django project.

django

Reamaze for GitHub

$
0
0

How many times have you had a customer write in to inform you of a bug? How many times have you wished for the ability to log said bug directly into GitHub through your customer support solution? Reamaze now offers you the ability to do just that. It’s a great way to keep things in sync and your customers happy!

To get started, you’ll need a Reamaze account. Simply head on over to Settings > Apps > GitHub

Authorize Reamaze for GitHub by entering your GitHub password.

After connecting GitHub, you’ll be able to link your brands to an organization within GitHub. Simply click on “Save” to confirm your settings.

Try logging a Reamaze conversation into GitHub!

Enjoy the convenience =)


Reamaze for Developers

$
0
0

We’re sure you’ve wondered what else Reamaze is capable of. If you’re still wondering, check out our new Reamaze Developers Documentation portal to get a glimpse of all the wild possibilities! The developers documentation has three main sections: Widget SDK, Mobile SDK, and API Reference.

The Widget SDK will introduce you to all the ways you can take advantage of Reamaze’s front-end Lightbox, Shoutbox, embedded contact forms, and embedded KB user interfaces through simple JavaScript integrations. Advanced users will also find access to settings such as Auth & SSO, Custom Form Fields, and Unread Callbacks.

The Mobile SDK is still under development but offers you a glimpse into what is coming in the new year. The Reamaze Mobile SDK will help implement an awesome customer service experience into your mobile app.

The Reamaze API allows you to access customer data through a REST-like interface. When implemented you will have access to your KB articles, contacts, conversations, and messages.

Coming Soon: Reamaze for Bigcommerce

$
0
0

Your Bigcommerce store is about to get a whole lot better for 2015. In just a few more days you’ll be able to bring Reamaze right into your Bigcommerce dashboard by dropping a simple JavaScript snippet into your theme template! The Reamaze app will also display useful customer information so you can be the support guru you were always meant to be.

Take advantage of knowing when a customer first became a patron, how many orders they’ve placed, when their last order was, their order status, and much more! It’s going to be amazing to have instant access to the most important customer information so you can focus on providing the best service possible.

There are of course more advanced integrations options for all you savvy folks out there such as adding a Reamaze Support Lightbox, adding custom triggers to trigger the Reamaze Support Lightbox, restricting new conversations to a specific channel, adding custom fields to the lightbox, or authenticating users.

Keep an eye out on the official announcement of Reamaze for Bigcommerce, you’ll of course need to have both accounts handy. Once you do, head on over to our knowledge base article on how to integrate Reamaze into your Bigcommerce store.

Reamaze for MailChimp

$
0
0

You read that right. We’re definitely on a roll recently and we think it’s a great start for 2015. You can now connect your beloved MailChimp account to Reamaze so you’ll never lose sight of a 5-star customer!

This simple integration will allow you to see which lists a customer is subscribed to, their star rating, which campaigns they’ve received in the past, and manage their subscriptions with a simple glance to the right of your ongoing conversation.

Great customer support is all about knowing and understanding your customers at the right time. The MailChimp connection will allow you to streamline your support processes and maximize efficiency across your support team.

To get started, head on over to Settings and then Apps. Select MailChimp from the list. Click “Connect to MailChimp”.

Enter your credentials and allow Reamaze to connect with your MailChimp account.

Look for the success message to confirm your connection. You may also come to this page to refresh your authentication or disconnect your MailChimp account as needed.

Going forward, the right rail of a customer conversations will populate with your MailChimp customer data if the email address matches. You’ll be able to see past campaign histories, their current list subscriptions, and their quality.

Easy right? So go ahead. Unleash your inner support monkey!

Reamaze Helpdesk and Livechat for Bigcommerce

$
0
0

The first piece of news we announced in 2015 was the planned release of a Reamaze integration for Bigcommerce. As you can probably tell by now, eCommerce platforms like Bigcommerce live very close to our hearts. Their support and dedication to small businesses speak deeply about our own passion for SMBs.

We’re pretty proud of what we’ve been able to build with the Bigcommerce team. With this integration, you can now bring Reamaze right into your Bigcommerce storefront dashboard and your customers’ most pertinent information will magically follow suit. Trust us. It’s going to be an amazing experience. In addition, Bigcommerce offers support for more integrated solutions such as Reamaze’s custom shoutbox and lightbox. You can find more information about it here.

If you’re new just starting out with Bigcommerce or Reamaze, feel free to shoot us an email at support@reamaze.com and we’d be happy to provide free advice on how to integrate Reamaze with your new store and get the most out of amodern support team.

Click on the image below to visit our Bigcommerce app store page!

Our Reamaze Experience: TRIANGLE.GS

$
0
0

Triangle.gs is sometimes better known around the gaming community as the “Dropbox for game servers”. Their mission and purpose is to make the lives of people who want to host game servers easier by offering full-packged and unlimited game-server hosting for free. This includes 24/7 customer support, DDoS protection, free MySQL, FTP, and legendary performance networks.

As of early 2015, Triangle.gs has hosted more than 160,000 game servers on their platform. Customer support has always been an important anchor for the Triangle team. Triangle grew from 0 – 130,000 users in less than 6 months by giving away free Minecraft servers and building a community around running their own servers/game types with friends or for profit. The team even built complete knowledge bases that taught anyone how to get started with hosting their own game servers.

Prior to Reamaze, the Triangle team’s customer support relied entirely on Groove’s helpdesk platform for assisting customers. When the Triangle team first approached us via email we were thrilled at the prospect of helping them scale customer support to their rapidly growing user base. The team immediately took advantage of the Reamaze API and JavaScript lightbox to increase intimacy with customers.

“Honestly, the best thing is the intimate experience our users get. We’ve seen an increase in happiness from them, they feel like they’re connecting directly with our team through the modal. We also use you guys in our Slack chat to see when tickets come in and what’s going on overall. It’s a nice overview for our management so we can tell if everyone is doing their thing right. We manage features and stuff using Github boards with Zenhub (they’re great substitute to Trello).”

- Vlad Nov @ TRIANGLE.GS 

The fully customizable and embeddable widget with integrated KB and inbound messaging gave the Triangle team a high effective combination they were looking for in an agile helpdesk.

“The main thing that made us go with Re:amaze was a robust API and your fast support. We thought the experience of having that modal open up was intimate. Adding a facebook-style notification would keep our users engaging with our site, as well as the alternative option of auto triggering emails for them.

Our users are gamers, which means that they don’t rely an email as heavily as the average person (because they’re often under 18). The modal provides a more familiar experience, something they can use on the site. Also, allowing the KB in the modal is a nice extra functionality, it lets users make a quick search and and then message us directly.

We also used your custom email format (which groove also didn’t have) to add our own email templates which look gangster on mobile.”

Triangle quickly indulged in many other features to increase not only their customers’ happiness but also their team’s happiness. Details like tags, automated workflows, archiving tickets, staff assignments/notes, and collision detection were leveraged frequently for coordination among teams.

In the past few months, the Triangle team has truly become an inseparable part of the Reamaze community. They’ve offered some great feedback on how to make Reamaze even better for awesomely agile and high-growth businesses like themselves. As the Reamaze platform continues to evolve we hope more businesses out there will leverage our powerful API and widgets to build out the customer support experience they’ve always wished for.

And if you’re looking for some minecraft with friends, check out Triangle’s tutorial on setting up your own server: http://bit.ly/172DGNH

Visit Triangle.gs | Follow on them Twitter

Spectator Mode

$
0
0

Reamaze has always benefited from a very robust collision detection system. The current system detects messages sent to the same customer by different teammates within a 5-minute window. The secondary message is held, the team member is notified of the collision, and is given a choice to either publish the secondary message as is or delete it. We’ll be the first to admit that collsion detection has saved our own butts more than just a few times.

But what good is collision detection if other team members still waste precious time and resources writing out a potentially long-winded reply? It certainly prevents the embarassment of looking uncoordinated but it doesn’t solve the root problem: your teammates can’t see what you’re doing.

This is where Spectator Mode comes in. We want to help you save time and resources by alerting you of another teammate’s presence in a particular conversation. If a teammate is viewing or replying to a particular conversation already, their avatar will appear in the top left menu navigation to alert you of their ongoing action.

How to Reamaze: Squarespace

$
0
0

Reamaze’s awesome JavaScript support widgets are actually alarmingly easy to implement. When I first joined the team I was skeptical when my coworkers told me that literally everyone should be able to install our widgets on their site. I was so skeptical in fact that I actively avoided learning it. Months later after a short session with a coworker who patiently walked through the process with me I literally hated myself for not learning it sooner. To make up for my timidness I would like to spend a few moments with you to share what I have learned. The goal is to a) reinforce my learnings and b) to show you just how easy our team has made things for you.

For this session, we’re going to use Squarespace. Squarespace is a site builder loved by many in the fine arts services space. Photographers, artists, boutique store owners, and artisan crafters love Squarespace for its beautiful templates and wonderful customer serivce. Their team is impeccable and their product confirms it. I’m an amateur photographer by night so this is the most perfect opportunity for me to show you how I’ve installed Reamaze’s shoutbox widget.

Step 1

When you first log into your Squarespace account, you’ll most likely be greeted with this main navigation menu. Go ahead and click on “PAGES”. This is where most of your site content lives. Let’s start there.

Step 2

Squarespace organizes your sites content by hierarchy. If you want to install Reamaze’s shoutbox widget on the main homepage, you’ll want to find the main page anchor. For me, this is called “Work”. Click on the gear icon to open that page’s settings panel.

Once you click on the gear icon. This settings panel will appear on the right hand side. Click on “Advanced” to open the HTML editor. Now, head on over to the developer documentation. Copy the script under “Base Installation”, paste it here in the first line. Copy the script under “Brand Identification” and paste it underneath the first script. Replace {{ YOUR_BRAND_SUBDOMAIN }} with your subdomain name. Now head on over to the next page by click next or go to the Basic Shoutbox section. Pick the mode you like to install: Contact Mode or Self Service Mode. Copy the script under “Installation” and paste it underneath. You’re pretty much done at this point. Click “SAVE” and see if you like the look and feel!

If you want to customize the look and feel of that widget trigger (which by default is a gray circle with a question mark), you can copy the script under “Customizing Trigger Color, Sizing, and Label”. You can define where you want to place the widget trigger. For example, I used 10 pixels from the right and 10 pixels from the bottom. For the label, just type what you want the trigger to say. I wrote “Ask Us a Question”. Pick a size (the standard is 32). Pick an icon (either ‘help’ or ‘chat’). Lastly, pick a nice color that matches your site. You’re done! Click “SAVE” and take a look.

It should look something like the following:

Step 3

Now let’s say you want to try another Reamaze widget called “Contact Form”. The contact form widget will allow your customers to fill out a form and log it as a conversation in your Reamaze dashbaord. Go ahead and pick a page you want to install this widget on. I picked “About” for mine. Click on the gear icon like earlier to bring up the settings panel. Because this is not the index page (home page) of your site, you will now only be editing the page header. You can inject code here.

Click on “Advanced” and paste in the “Base Installation” script again from earlier. Also paste in the “Brand Identification” script. Stop here because this is all you need for the header section. The contact form itself needs to be inserted into the page content so we’ll worry about that next. Click “SAVE”.

Step 4

Now, back on the “About” page, you’ll want to start editing the body of the page. Squarespace lets you visualize everything so it’s fairly easy to determine where you want to insert something like a contact form. Pick the relevant section, mouse over it, and click “EDIT”.

Move your mouse to where you want to insert a contact form until this line appears and a bubble appears. Click it and Squarespace will ask you what you want to insert here. You can choose from a wide variety of widgets they offer.

Search for a widget called “Code”.

When you add code, a box like this will pop up. Now go back to the Reamaze developer docs for contact form. Copy the script under “Installation” and paste it here. Click “SAVE”. And you’re done.

You should now see something like this:

Conclusion

To be honest, there’s not much to conclude other than how easy that was. Reading through my guide is probably more work than actually doing it. I hope you learned something and can implement Reamaze on your Squarespace site. If you have any questions feel free to ping us at support@reamaze.com! Thanks!


Reamaze Recipe: Capture Customers’ Moods Using Auto-Tagging and Workflows

$
0
0

Have you ever wanted to capture your customers’ emotions as they were typing their message to your support team? Wouldn’t be awesome to gauge how they were feeling? What you really want is to capture your customers’ moods so you can better service them in a timely fashion.

We’re going to share a recipe with you today using a combination of Reamaze’s flexible widgets and features such as tagging and workflows. The result will be an automated way to tag conversations based on your customers’ mood. You can then triage your team to tackle these conversations. Let’s get started.

Step 1

Make sure you have the base installation and brand identification scripts installed. You can find detailed instructions here: http://www.reamaze.com/developer/widget. The two scripts are:

Step 2

Install the Reamaze Lightbox, Shoutbox, or Embedded Contact Form. You can find the install scripts for each of the following here:

http://www.reamaze.com/developer/widget_basic

http://www.reamaze.com/developer/widget_lightbox

http://www.reamaze.com/developer/widget_form

Step 3

For this example, we’re going to use the Reamaze Shoutbox. Go to the page in the developer doc that details “Custom Form Fields“. Copy and paste the installation script and paste it below the installation script for the shoutbox.

You’ll want to follow the instructions in the developer doc to configure selections for the dropdown menu. We recommend the “dropdown” type because it allows you to consistently capture customers’ moods. You can copy our example below as a first test.

In this example, you will be creating a dropdown menu that measures “Anxiety Level”. The moods are “Blissful, Happy, Meh, Annoyed, and Angry”. Each of these moods are designed to capture the customer’s current state of mind.

Step 4

Your Reamaze Shoutbox (or lightbox / embedded contact form) should now show a dropdown menu in addition to the normal fields.

Step 5

Now that we have established the moods we want to capture for prioritization, it’s time to automate things in Reamaze. Head on over to your Reamaze dashboard, go to “Settings”, then click on “Workflows”.

We want to create an automated workflow to tag a conversation as “Urgent Angry Customers” when a customer submits a message with the “Angry” mood selected. Alternatively, you can create an automated workflow to tag conversation as “Blissed Customers” when a customer submits a message with the “Blissful” mood selected.

Follow the screenshot below to create your first automated workflow. Keep in mind that the “Custom Form Field” should be whatever you named the “dropdown_value” in the install script. In our example, it is “anxiety_level”.

Step 6

In our angry customer above, Rodina submitted a message with the “Angry” mood selected. This is what everything will look like to the agent receiving the message. Note that this message is already tagged as “Urgent Angry Customers”! How convenient!

You can now coordinate your entire support process around how your customers feel! And because everything we did is automated you never have to worry about losing focus on angry customers!

Alternatively, you can check out the “Urgent Angry Customers” tag filter on the left side of your main dashboard:

Step 7

Another added benefit of using automated workflows to tag customer moods is the ability to run reports based on tags. Check it out!

We hope you enjoyed this simple recipe. Hopefully you’ll be able to apply it to your process and better serve your customers. Remember, these are basic recipes for your to improve upon. We’re sure you can think of many more creative ways to use Reamaze!

Reamaze Recipe: VIP Queue / Special Agent Attention

$
0
0

In last week’s Reamaze Recipe session we taught you the basics on creating some custom form fields in the Reamaze Shoutbox, Lightbox, and Embedded Contact Form. These custom form fields were then used to capture customers’ moods and we created workflows to automatically tag the conversations for priotization. That simple recipe gave you a glimpse into how Reamaze’s many features actually behave like lego blocks. You can build them however you want!

This week we want to share a new recipe with you. Try to imagine for a moment that you’ve segmented your customers into different pools based on how valuable they are to your business. And while it’s important to take care of everyone, someone in the VIP pool definitely requires your most immediate attention. How do you go about doing this? Let’s get started.

Step 1

In order for Reamaze to know which customers are important it’s up to you to tell us who they are. There are two ways to go about doing this. The manual way is to use Reamaze’s customer profile view to add what we call “Customer Data Attributes”. Each customer data attribute is a key-value pair that you can define.

The second, more automated way to add customer data attributes is to use Reamaze’s “Customer Authentication/Single Sign-on” along with the “Customer Data Attributes” JavaScript widgets. When your customers are logged in and authenticated, this method allows you to automate the passing and syncing of customer data to Reamaze. Remember, in order to utilize the automated “Customer Data Attributes” widget, you’ll first need to implement “Customer Authentication/Single Sign-on“.

After implementing authentication and single sign-on, simply proceed to installing the “Customer Data Attributes” widget.

Whether you’re manually entering or automating the creation of customer data attributes, the customer data will be appended to all incoming conversations seen here:

Step 2

Now that we know more about the customers who write in, we can start to define how you want Reamaze to automatically handle specific types of customers. In our example, we will be classifying customers by their “Account Status”. We have three tiers: Gold, Silver, and Bronze. The first customer, Soo-Hyun Kim, is Silver status. The second customer, Rodina Swanson, is Gold status.

Let’s now create some workflows to automate this process:

First, we’re naming this workflow “Gold Status VIP”. For the command, we want to 1) automatically assign it to an agent named Chris Dunnan and 2) add an internal note to the incoming conversation to tell Chris to address this particular customers’ concerns ASAP. If you want to get a little more fancy, you can take our previous recipe on tagging and apply a tag to these conversation.

We also want this workflow to trigger when the “Customer Data Attribute” label contains “Gold”.

Step 3

Now that we know Rodina is a Gold status VIP customer and you have a workflow ready to capture her requests, let’s see what happens when she writes in again.

Rodina writes in complaining about a delayed order. Oh no! She’s an important customer, we definitely want Chris to follow up with her ASAP. Luckily, the workflow caught Rodina’s message and automatically assigned it to Chris! This is because Workflows recognized Rodina’s customer data attribute as Account Status = Gold!

In addition, workflows also created an internal note to remind Chris that Rodina is an important customer so he better tend to here ASAP.

We hope you enjoyed this simple recipe. Hopefully you’ll be able to apply it to your process and better serve your customers. Remember, these are basic recipes for your to improve upon. We’re sure you can think of many more creative ways to use Reamaze!

How to Reamaze: Shopify

$
0
0

It’s time to Shopify! Shopify is aboslutely one of our favorite ecommerce platforms out there today. It’s brilliantly easy to use, immensely robust, and wonderfully accessible in terms of what you want to get out of your business. With Reamaze for Shopify you’ll be able to sync relevant customer data, integrate our JavaScript Shoutbox widget, and bring the Reamaze interface into your Shopify dashboard with a few simple clicks. We’ll also teach you some more advanced toggles so you can customize Reamaze to your heart’s content.

Let’s get started.

Step 1

We imagine that if you’re looking through this tutorial then you already have a Shopify store set up. You will also need an active Reamaze account to connect to. To get started with the integration you’ll need to first connect your store to Reamaze. You can do that in three places: 1) http://www.reamaze.com/apps/shopify and 2) https://apps.shopify.com/reamaze. We actually recommend logging into your Shopify dashboard first and then heading over to Apps.

Step 2

Give permissions to Reamaze and enter the relevant credentials to complete the install.

Step 3

When you first install Reamaze, you’ll see the Reamaze dashboard appear within your Shopify dashboard. In addition, if you visit your Shopify store site, the default Reamaze JavaScript Shoutbox is also installed. This Shoutbox gives your customers access to an instant communication channel so they no longer have to use their own email to contact you. This default Shoutbox (Contact mode) appears as a gray circle trigger with a white question mark. We will talk about how to change the trigger color later in this tutorial. The color of the Shoutbox itself is found in brand settings of your Reamaze account. The default Shoutbox’s Contact Mode brings up the messaging module. There is another option to bring up the Self Service Mode first which displays the KB. We will discuss that later.

In addition, your customers’ emails that match up between Shopify and Reamaze will have their information synchronized in both systems. This provides your support conversations with detailed context of who the customer is.

If this is all you need, then you can stop here. Reamaze is now integrated with your Shopify ecommerce platform! Easy, right?

If you want to customize the integration some more such as changing the trigger color, changing the Shoutbox’s default Contact Mode (brings up the messaging module first) to the Self Service Mode (brings up the knowledge base module first), or integrating the Reamaze JavaScript Lightbox, we will move on to the next step.

Step 4 (Changing the Trigger Color)

Let’s first talk about changing the Shoutbox’s trigger color. This seems to be the most frequently asked question to our support team. To start customizing the trigger color, you’ll need to first copy and paste an additional section of HTML into your site template’s “theme.liquid” HTML. First click on the “Edit HTML/CSS” option.

Step 4.1

Head on over to our KB article here and copy all the HTML in the gray box. Paste this block of HTML into the header section or body section of the theme.liquid template. In my example here, I pasted it after the < /header > tag.

Then head over to the Reamaze Developer document for customizing the trigger’s color here. Copy the example script at the bottom of the page. Paste it beneath what you pasted above. Your results should look like this when finished:

Step 4.2

In the example HTML / JavaScript you pasted above, you changed the default trigger to a “chat” bubble trigger that reads “Ask Us a Question”. It is also colored using #e57d58 which is an orange/reddish color.

You can change the location of the trigger by changing the pixel count under “Position”. It is defaulted to right: 10px and bottom: 10px.

You can change the label to anything you want. It is defaulted to “Ask Us a Question”. You can change it to something like “Contact Us”.

You can change the trigger size which is defaulted to 32. The larger the number the larger the trigger.

You can use http://www.colorpicker.com to find a color you like and retrieve the color code that appears on top of the color picker. It starts with a “#”.

That’s it!

Step 5 (Adding a JavaScript Lightbox in addition to the Shoutbox)

Let’s move on implementing a Reamaze Lightbox. The lightbox, unlike the Shoutbox, is not anchored to a predestined trigger element. It can live anywhere on your site and can be tied to things like text on your site or images on your site. The documentation for the lightbox is located here.

For example, if we wanted to add a Lightbox on our Shopify site’s “About Us” page. The trigger element we want to use is some text that reads “GET HELP HERE”.

Step 5.1

We first want to locate the page in your Shopify dashboard. Click on “Pages”, locate the title of the page and click to open it.

After opening the page for editing, click on the HTML icon on the right hand side to start editing in HTML mode.

Step 5.2

Locate the text you want to use as the trigger and add the following HTML around the highlighted text:

Step 5.3

The default Lightbox has a dimesion of 650px by 400px. You can change these dimesions by using this HTML instead of the one above:

Step 5.4

If you’re happy with the default values, simply click “Save” and preview your page. For us, the text that used to read “GET HELP HERE” is now clickable and brings up the Lightbox!

That’s it!

Step 6 (Defaulting the Shoutbox to Self Service Mode instead of Contact Mode)

To change the Shoutbox to display the Self Service Mode first, you’ll need to make a few small changes to the already pasted HTML/JavaScript in your theme.liquid template.

Simply delete the matching HTML from Step 4.1 and replace with the following highlighted HTML:

Click Save and that’s it! Your Reamaze Lightbox will now trigger the Self Service Mode first and display your knowledge base if you have one:

4 Updates Worth Talking About

$
0
0

You’ve probably noticed quite a lot of changes to Reamaze lately. Our team has been hard at work building and shipping improvements that many of you have requested. It was our goal in the past few weeks to focus on details that specifically improved YOUR user experience. As Reamaze continues to grow at an amazing pace it’s also important for us to step away from the big picture and look closely at the tools we’ve built and analyze their existence. We picked out 4 things we want to show off in more detail.

Dashboard Presence

We released Presence for conversations exactly a month ago to the day. Teams can now monitor teammates’ activities and actively avoid collisions. In addition, Presence gave team leads a birds-eye-view of which conversations are actively being engaged in.

Today, we’re adding enhanced functionality to Presence by bringing it to the main Reamaze dashboard. If there’s an agent currently viewing a conversation, the conversation is blurred out and the agent’s avatar is displayed. Presence also shows you when the agent is typing a reply.

Improved Workflows Rules and Automation

Workflows is now improved with “or” logic in addition to “and”. This greatly expands your ability to target specific conversation content and apply automation. We recommend trying things out to see how creative you can get!

We’ve also relocated triggers to appear above which user you want the workflow to apply to and specific commands.

Unread Counts on Tags

We’ve updated the tags list and filter to display unread counts. This one is pretty self explanatory =)

Embeddable Conversation History Widget

If you’re already using Reamaze’s Authentication/SSO features, you can now take advantage of a new widget on our developers page here called Embeddable Conversation History. This is a great way to display a customer’s support history anywhere on your site. It will render automatically inline and take up the available horizontal screen space (so it works well on mobile devices) and stretch its content vertically.

Enjoy! More updates and improvements coming soon!


How to Reamaze: Bigcommerce

$
0
0

This series has proven to be a huge success! We’ve already went through Squarespace and Shopify and now we’re ready to show you what we can do with Bigcommerce. Once you’ve registered for a Reamaze account and integrate it with Bigcommerce we’ll automatically sync pertinent customer information in the conversations view. In addition, you’ll be able to access your Reamaze right through your Bigcommerce dashboard!

In this tutorial, we’re also going to show you how to integrate Reamaze’s JavaScript Shoutbox, Lightbox, and Contact Form right into your storefront.

Let’s get started.

Step 1: Finding the Reamaze App

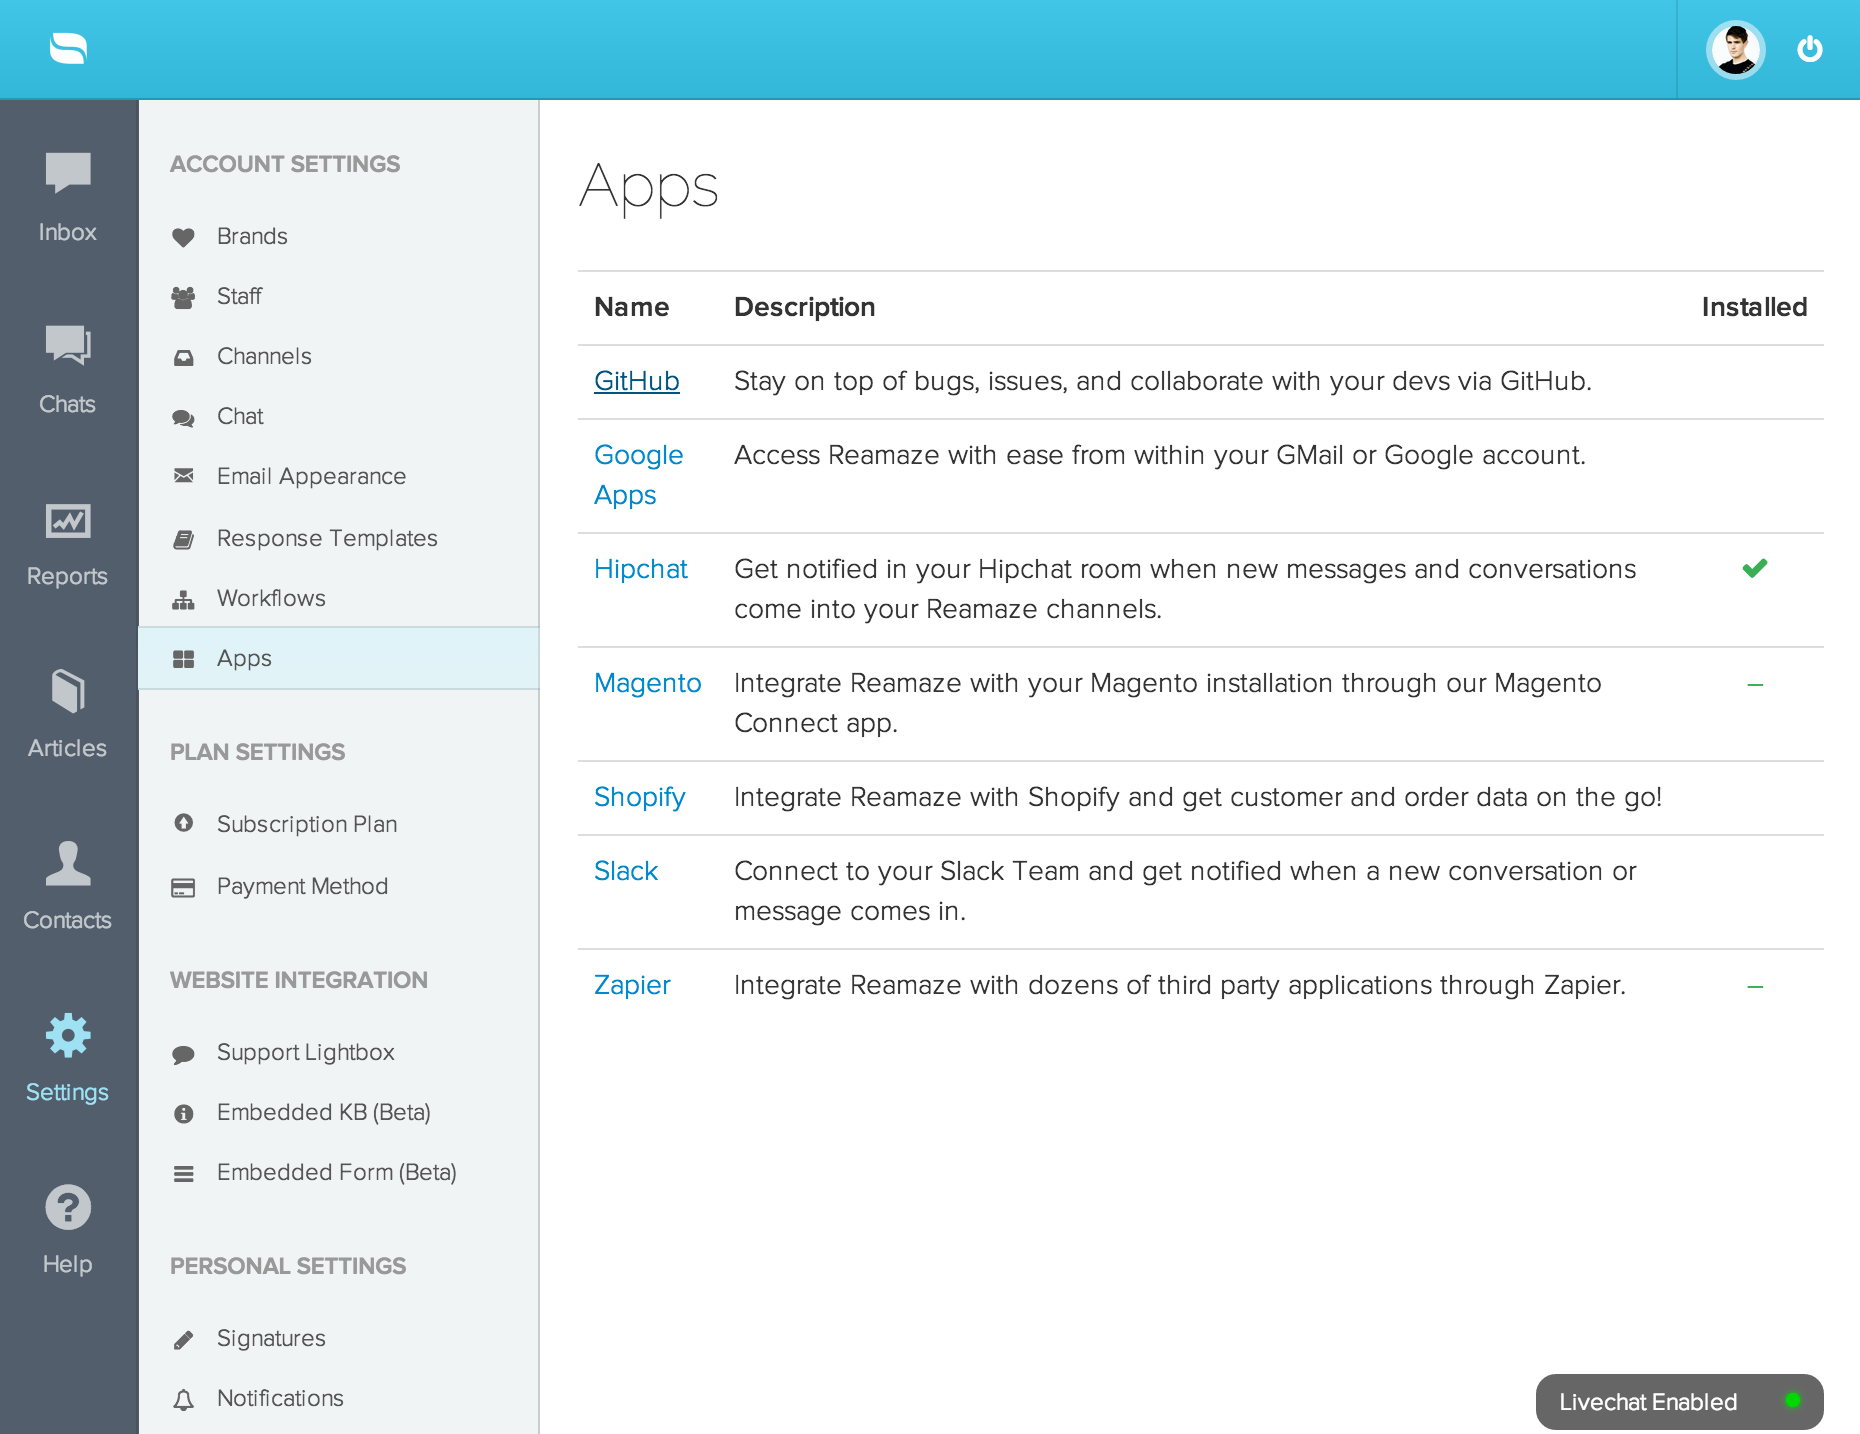
Log into your Bigcommerce account and click on the “Apps” icon on the left hand corner. Alternatively, you can access the Reamaze app here. Look for Reamaze under “Customer Feedback” or “Live Chat”. Confirm the app and install the Reamaze app to your Bigcommerce store.

Step 2: App Installation

Once Reamaze is installed and you’re logged in we will show you the first script you need to copy and paste. Go ahead and copy it for now. Once you’re back in Bigcommerce, you’ll see that you’re now able to access your Reamaze dashboard by clickng on the Reamaze logo on the left hand rail.

Step 3: Shoutbox

Now we’re going to learn how to install the Reamaze Shoutbox. The Shoutbox is a button that you can place on your site so customers can simply click on it to send you a message. We’ll also go over how to show your FAQ/Knowledge Base first instead of the contact box first.

We’re going to go through some basic HTML here we’ll go slow. First, click on the “Design” link on the top right. When you’re in the screen below, click on “Edit HTML/CSS”. Then click on the HTMLHead.html template on the left hand side.

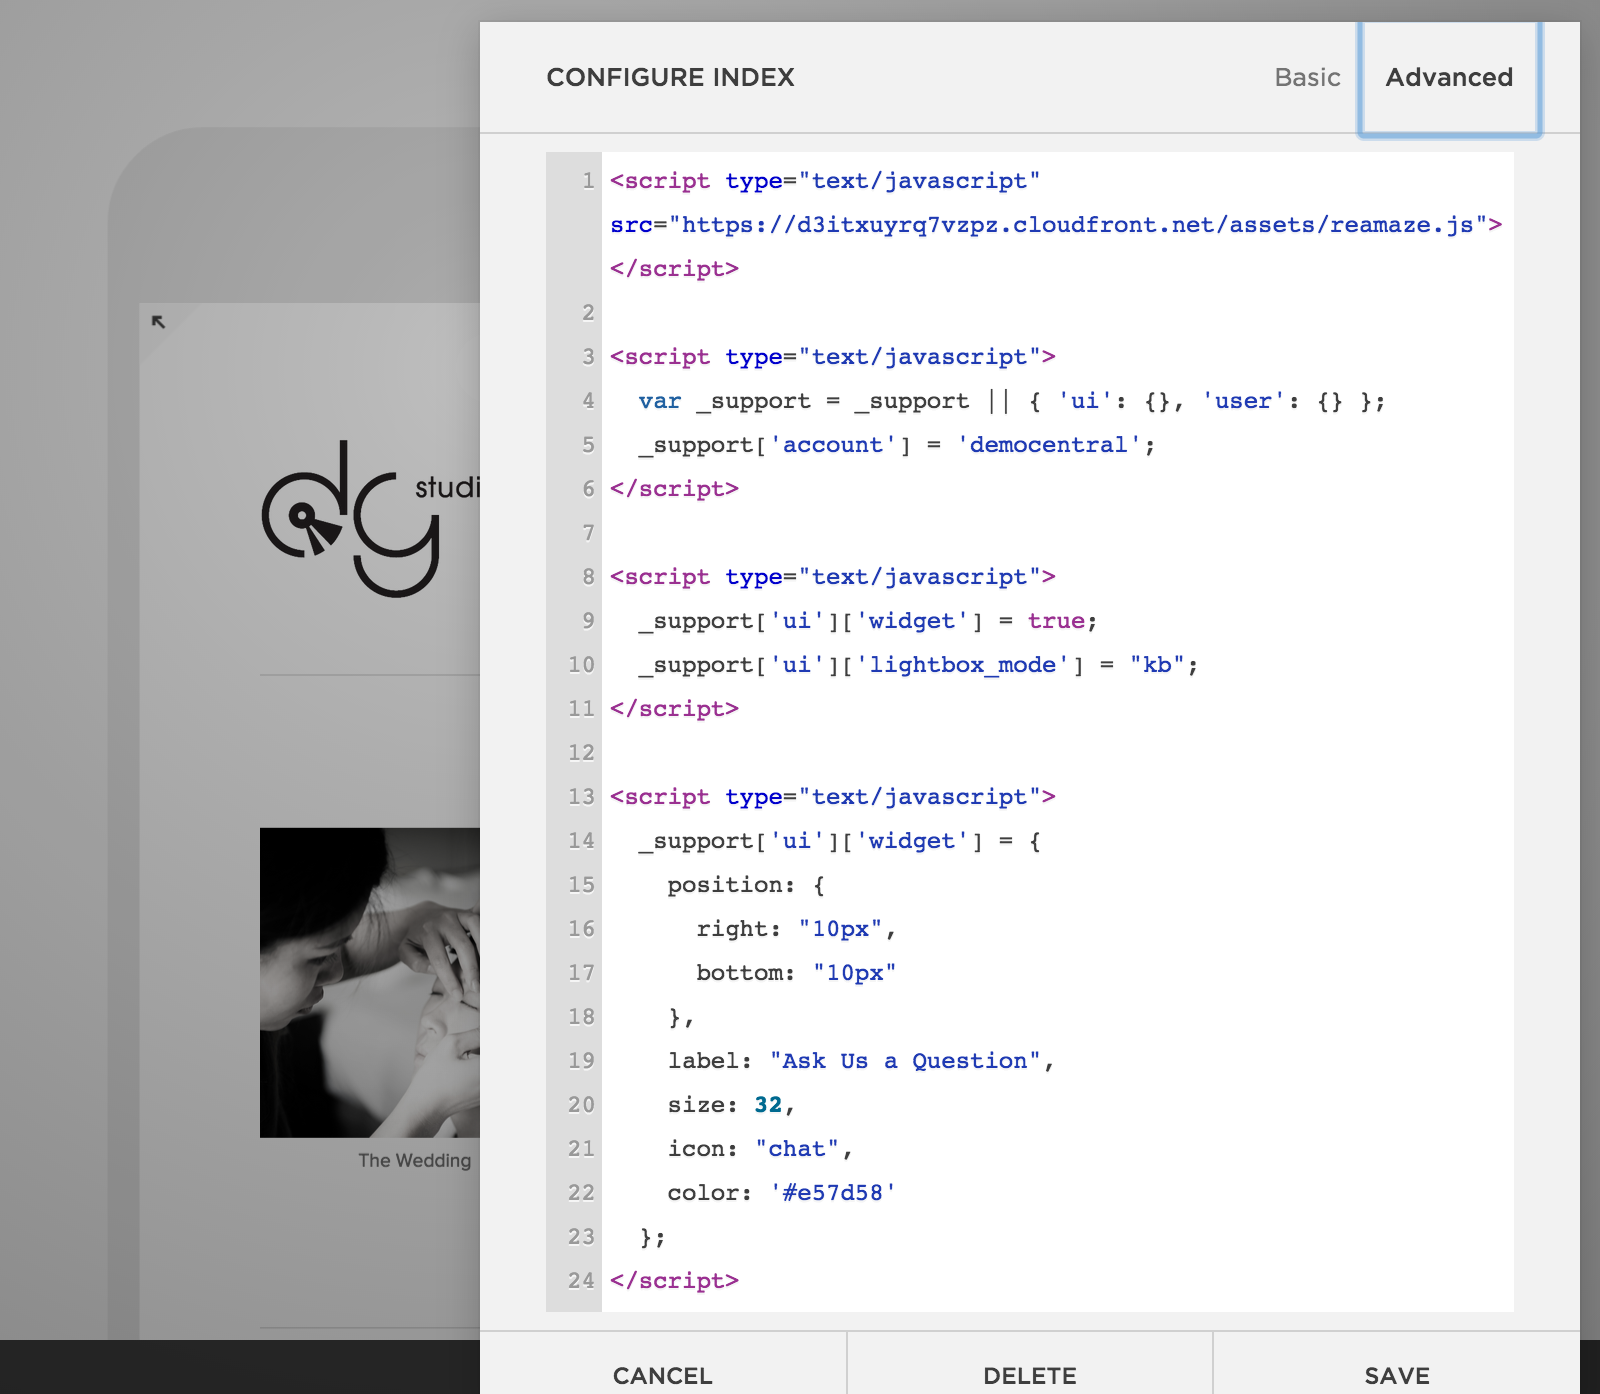
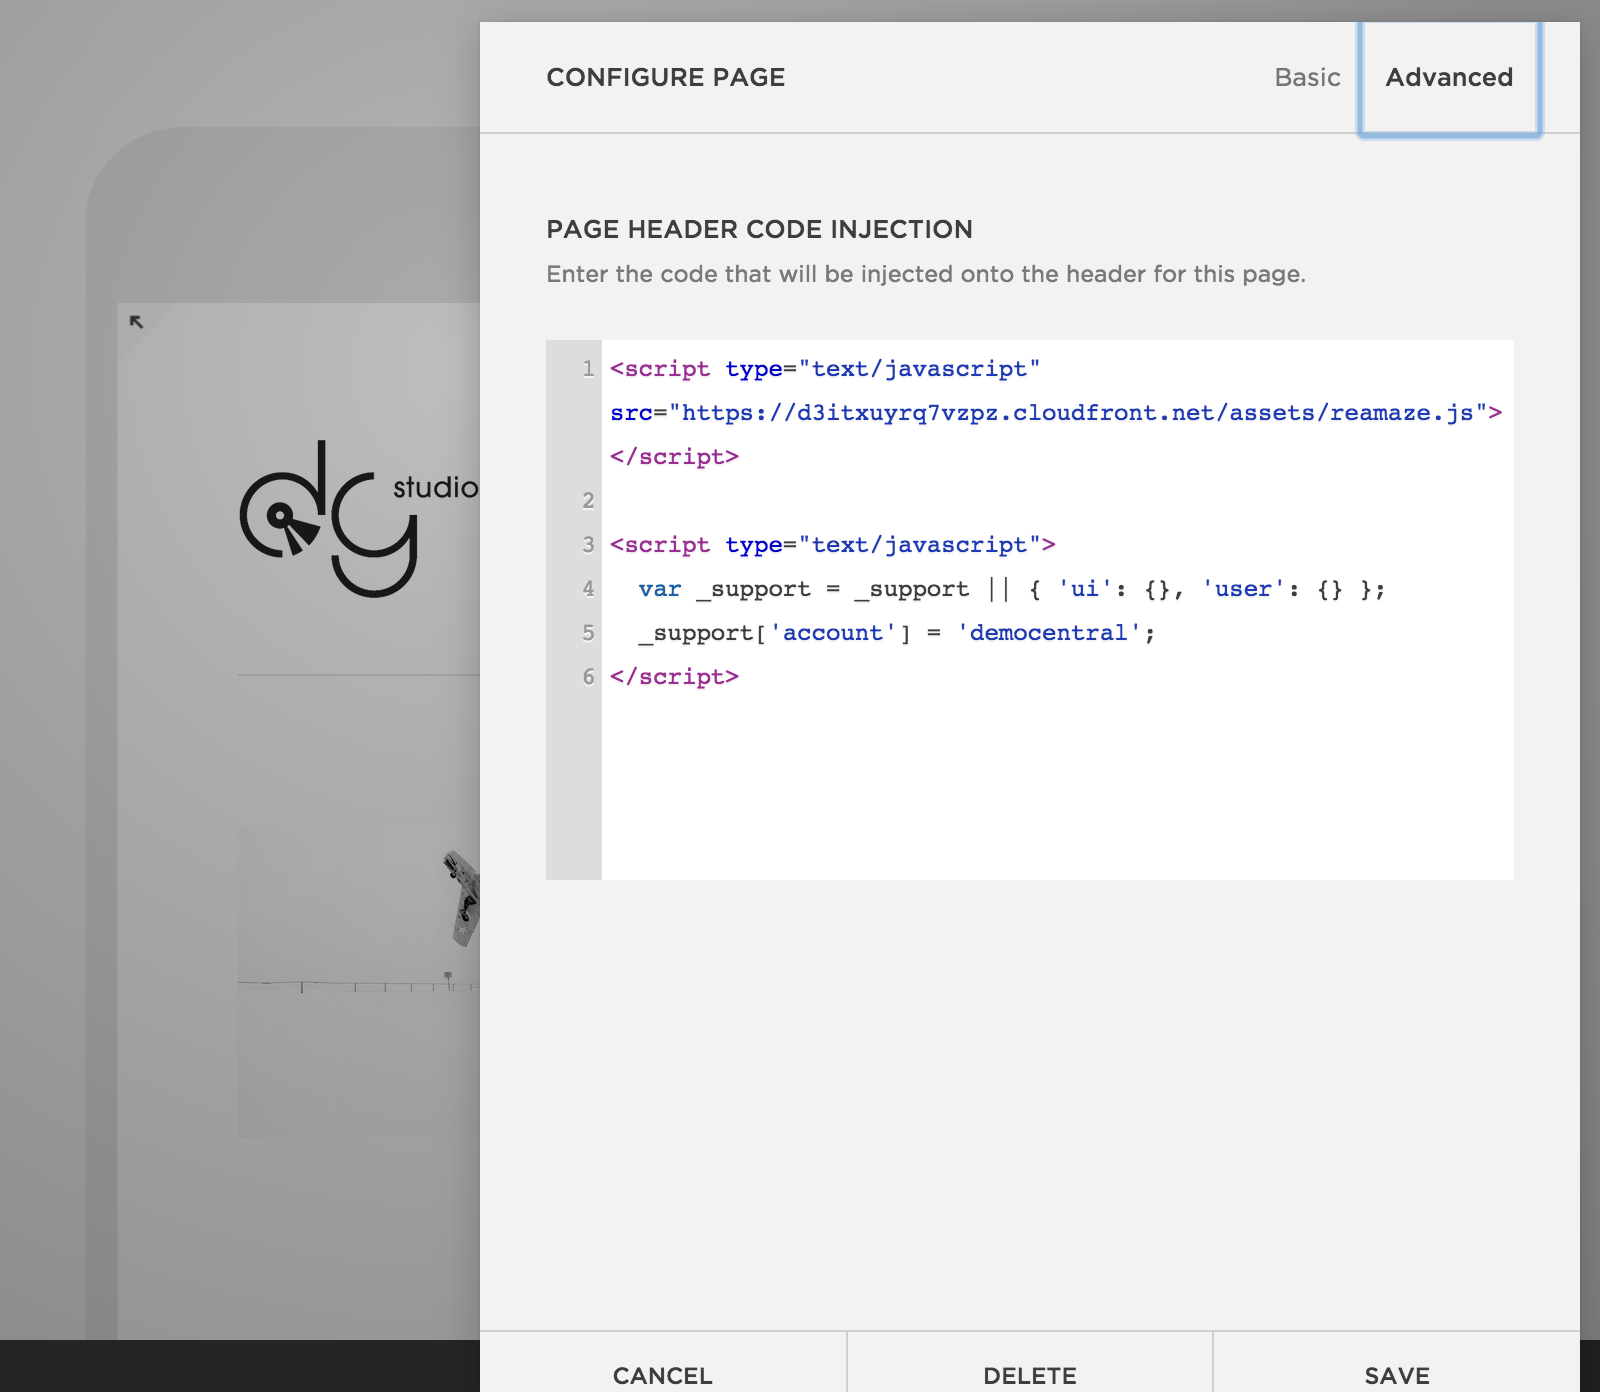
Now, paste the script you copied earlier right underneath the “head” HTML tag. Don’t worry, if you lost track of that script, you can find it here. It’s called the “Base Installation” script. In addition, copy the “Brand Identification” script and paste it beneath the first script. Make sure to enter your Reamaze subdomain instead of our example subdomain ‘democentral’.

The last script you need is the actual Shoutbox itself. Head on over to the Shoutbox Documentation and copy the “Contact Mode” installation script and paste it beneath the last script. When you’re done, you should have something that looks like the following screenshot (other than the subdomain part of course).
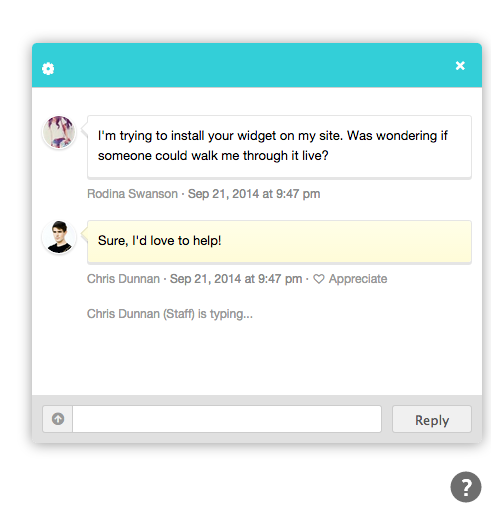
Click “Save” and take a look at your store homepage. It should look like the following. Our shoutbox is orange because that’s our Reamaze brand setting. You can change the color by going to your Reamaze settings. The Shoutbox is represented by the default question mark on the bottom right hand corner. When clicked on, the Shoutbox with the “Contact Mode” will show up.

Step 4: Shoutbox Trigger Customization

Most of you will want to change the default gray question mark “trigger”. Let’s do that now. Head on over to trigger documentation and copy the installation script in the second black box. This is a pre-formatted example that will change your trigger to something more visible. Paste the script beneath in the same HTML template you were editing earlier.

Click save, refresh your homepage and check out the new trigger!

Now let’s say you don’t like that orange color. You can change it easily by entering a color hex code. You can find your’s here. Replace the orignal hex code in the example and save again. We changed our’s to a flashy green and changed the call-to-action to “Contact Us” while we were at it.

Step 5: Shoutbox Self Service Mode

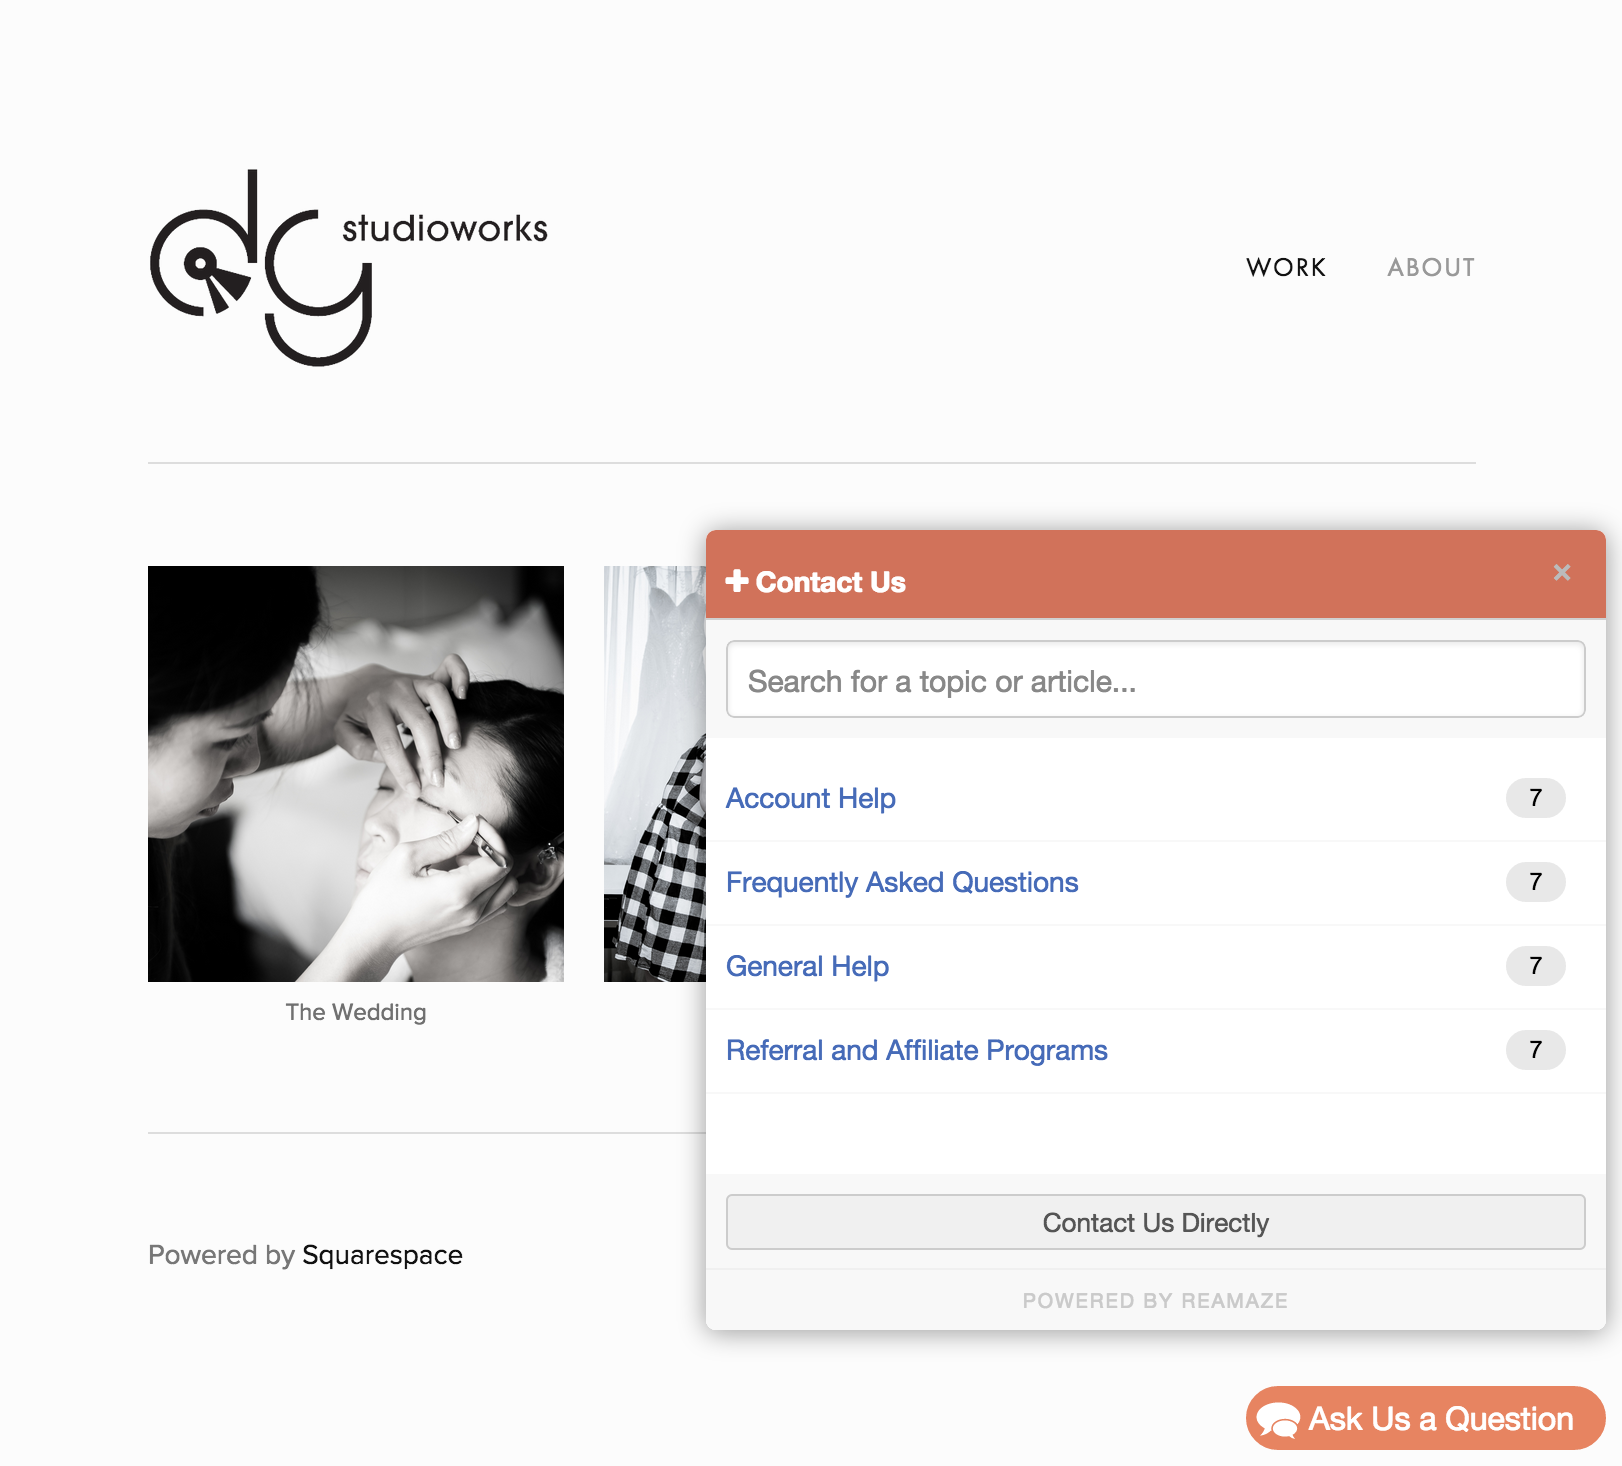
Now lets’ make the Shoutbox show your FAQ/Knowledge Base first. This part is really simple. Head on over to the Shoutbox Documentation again and copy the “Self Service Mode” script and replace the “Contact Mode” script from Step 3. Your template should now look like this:

This is what it now looks like if you save and refresh.

Step 6: Lightbox

We’re going to move onto a different JavaScript widget called the Reamaze Lightbox. The lightbox is different from the Shoutbox because you can have it show up using any trigger of your choice. This could be a line of text or an image already on your website. To make this tutorial easier, we’re just going to be using the standard “Contact Us” page.

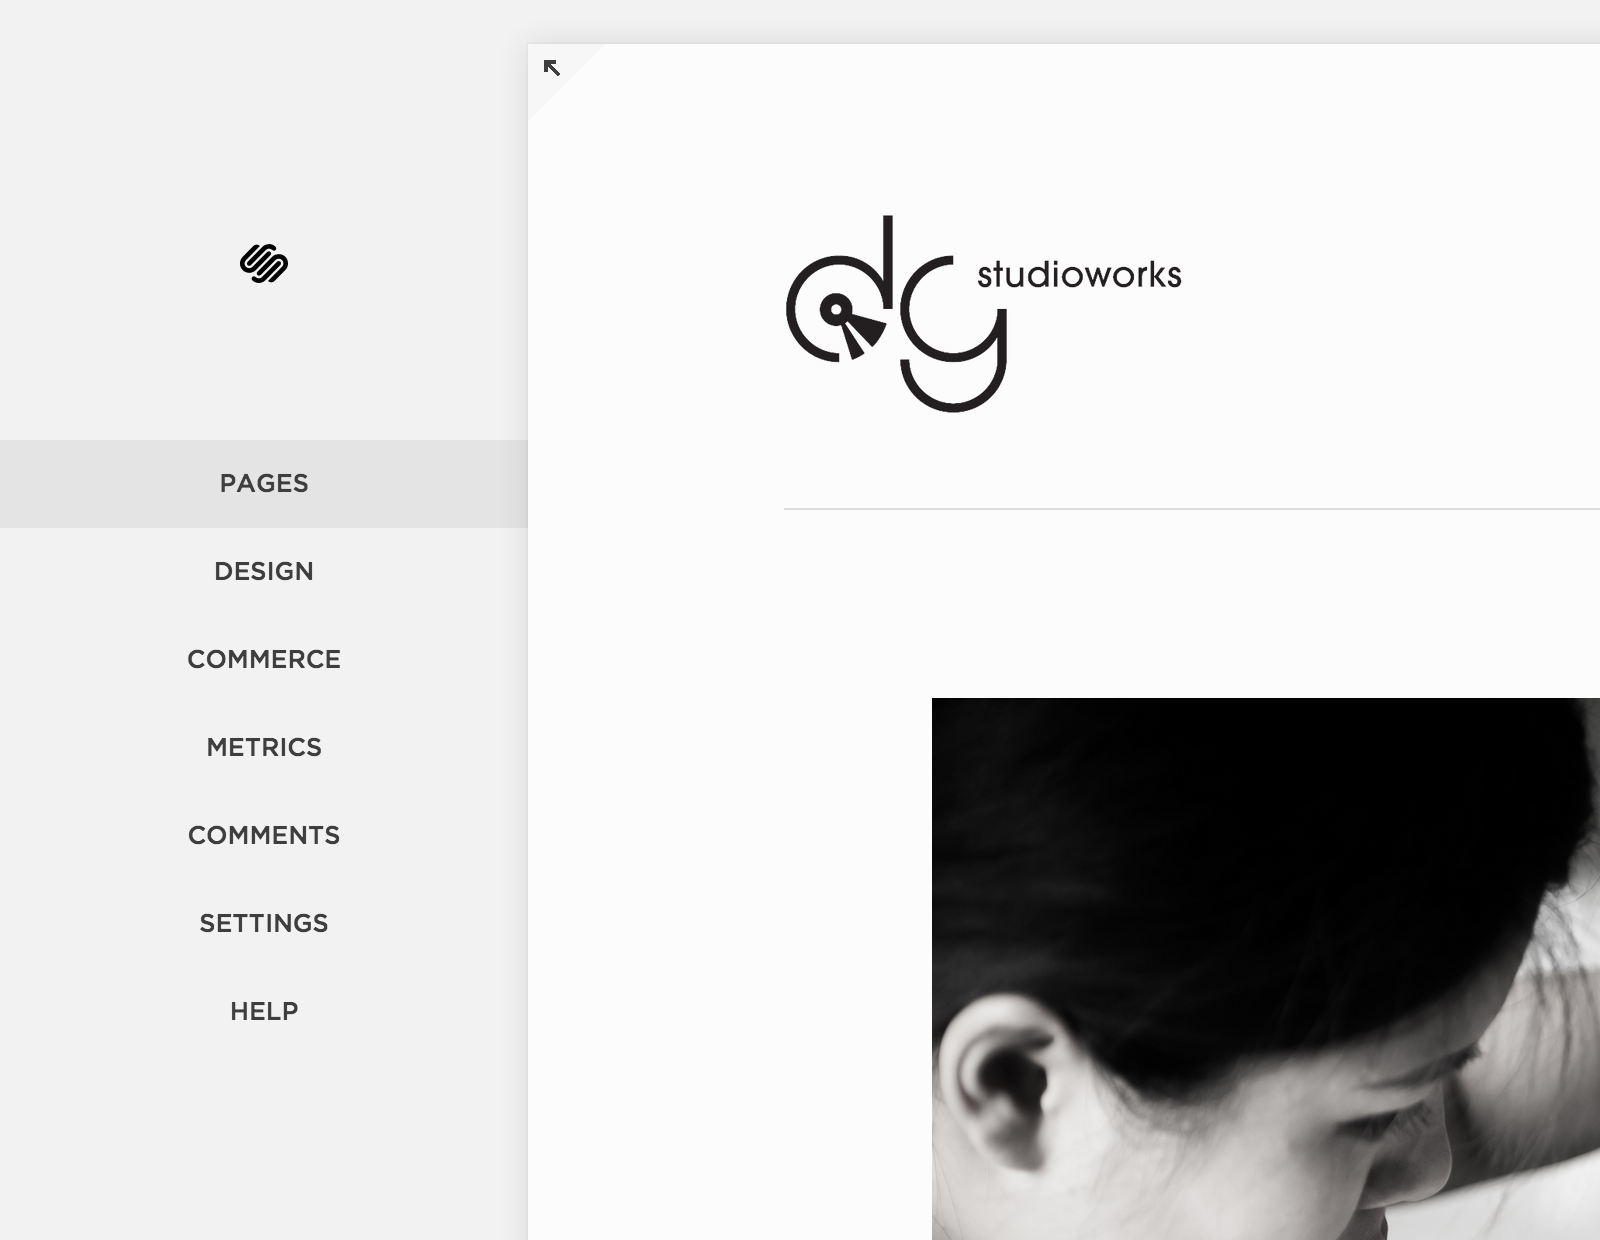
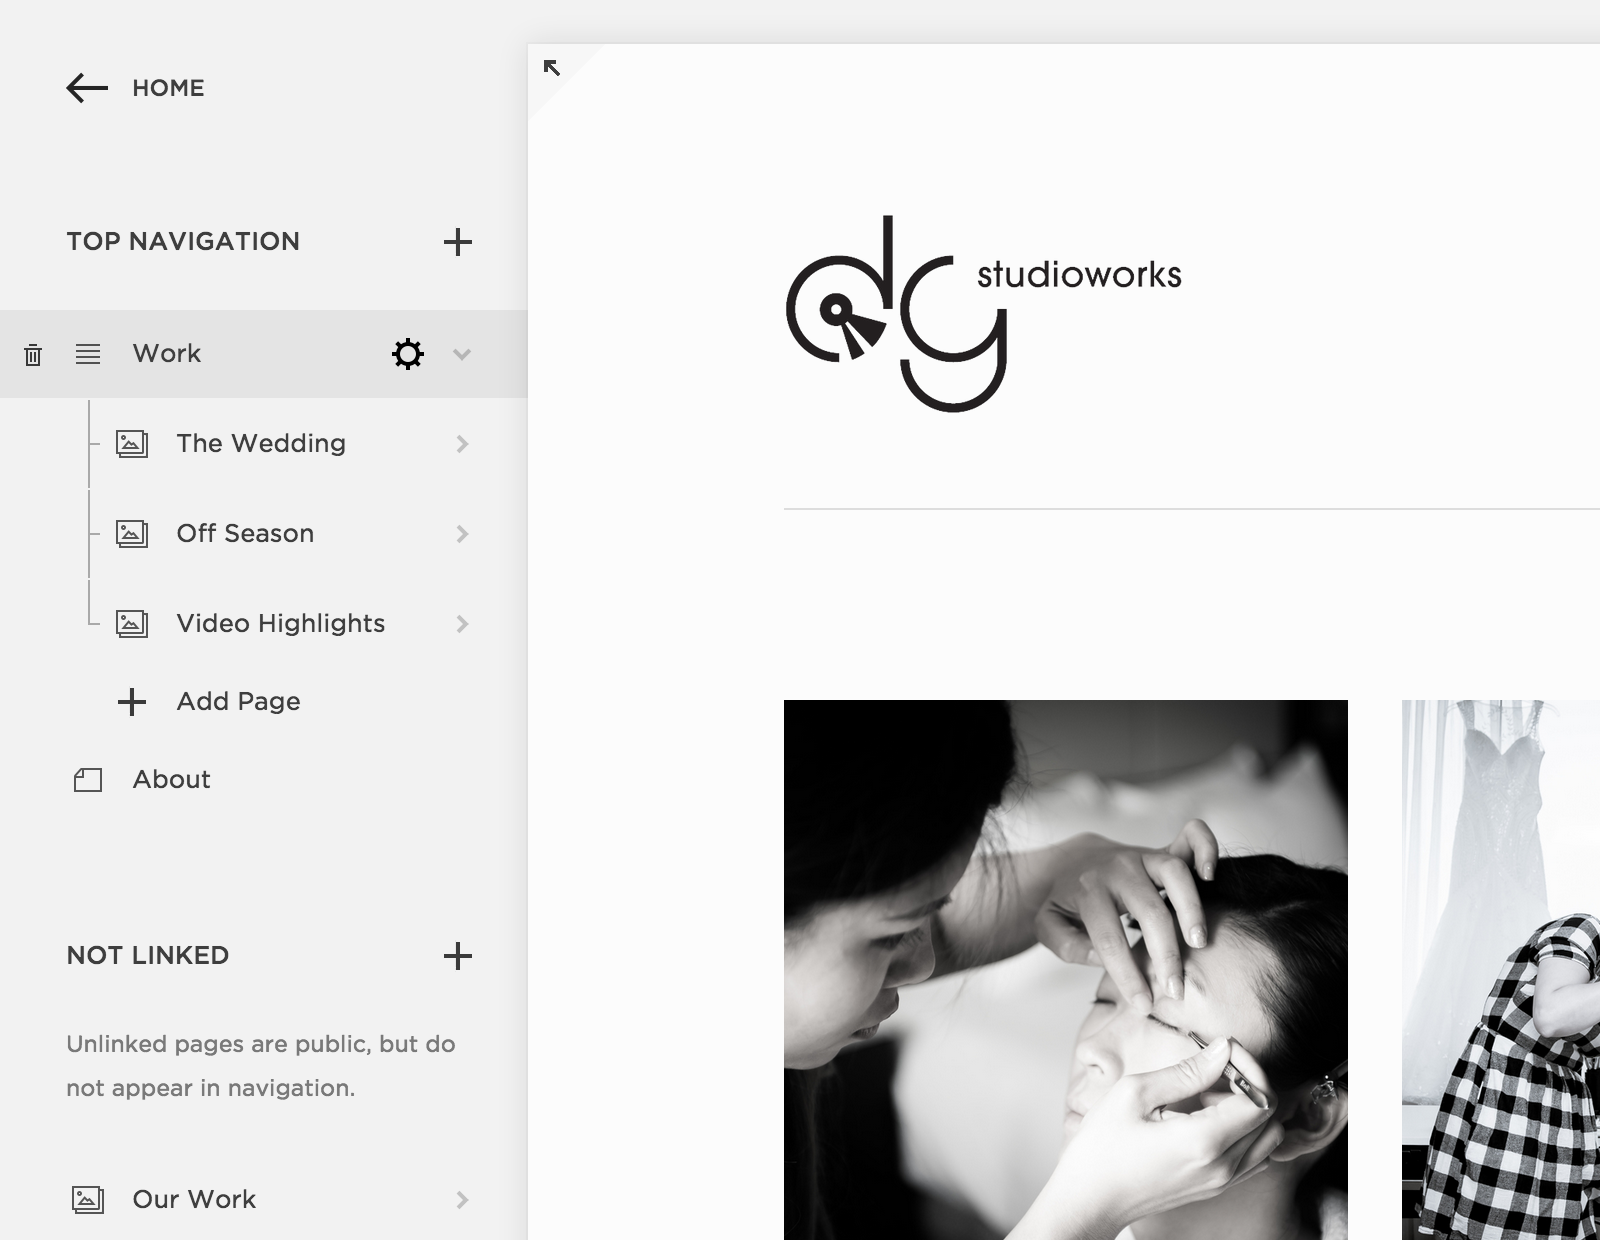
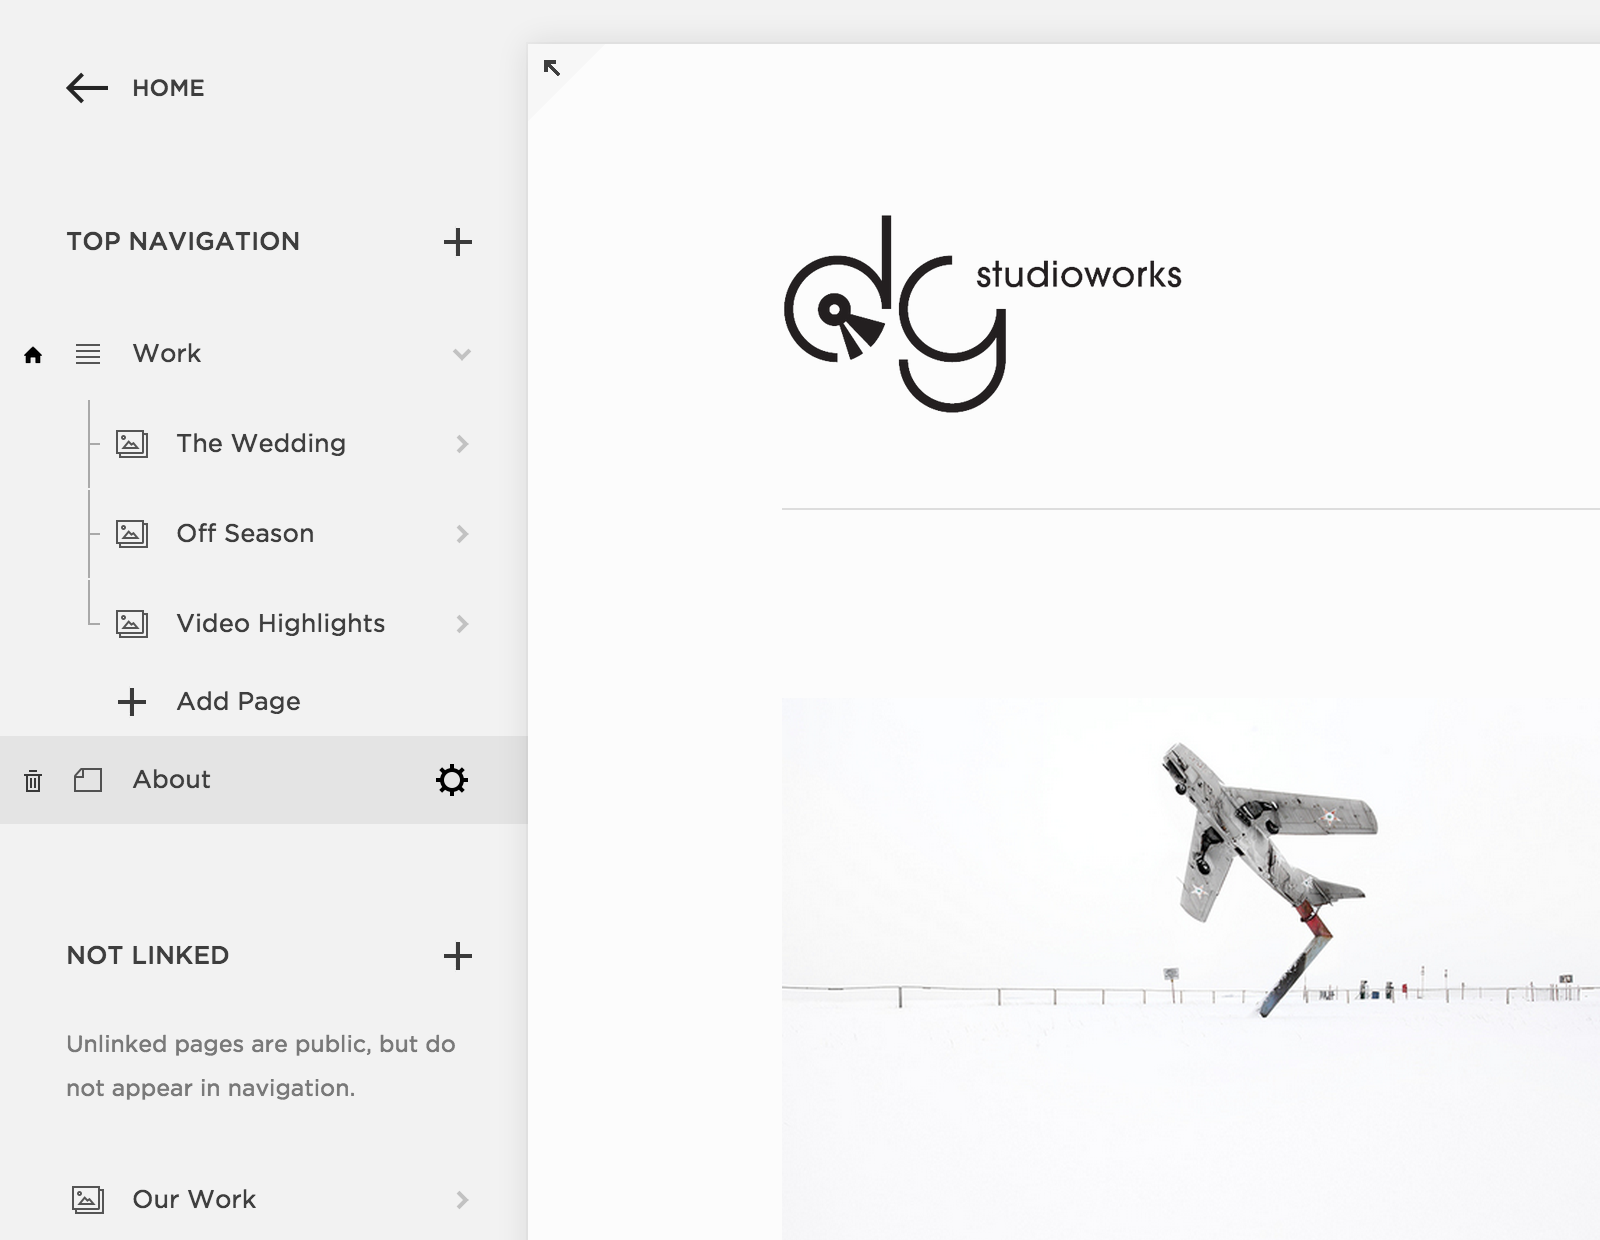
To get started, access one of your site pages using the “Web Content” menu. Click on the gear icon to start editing the page.
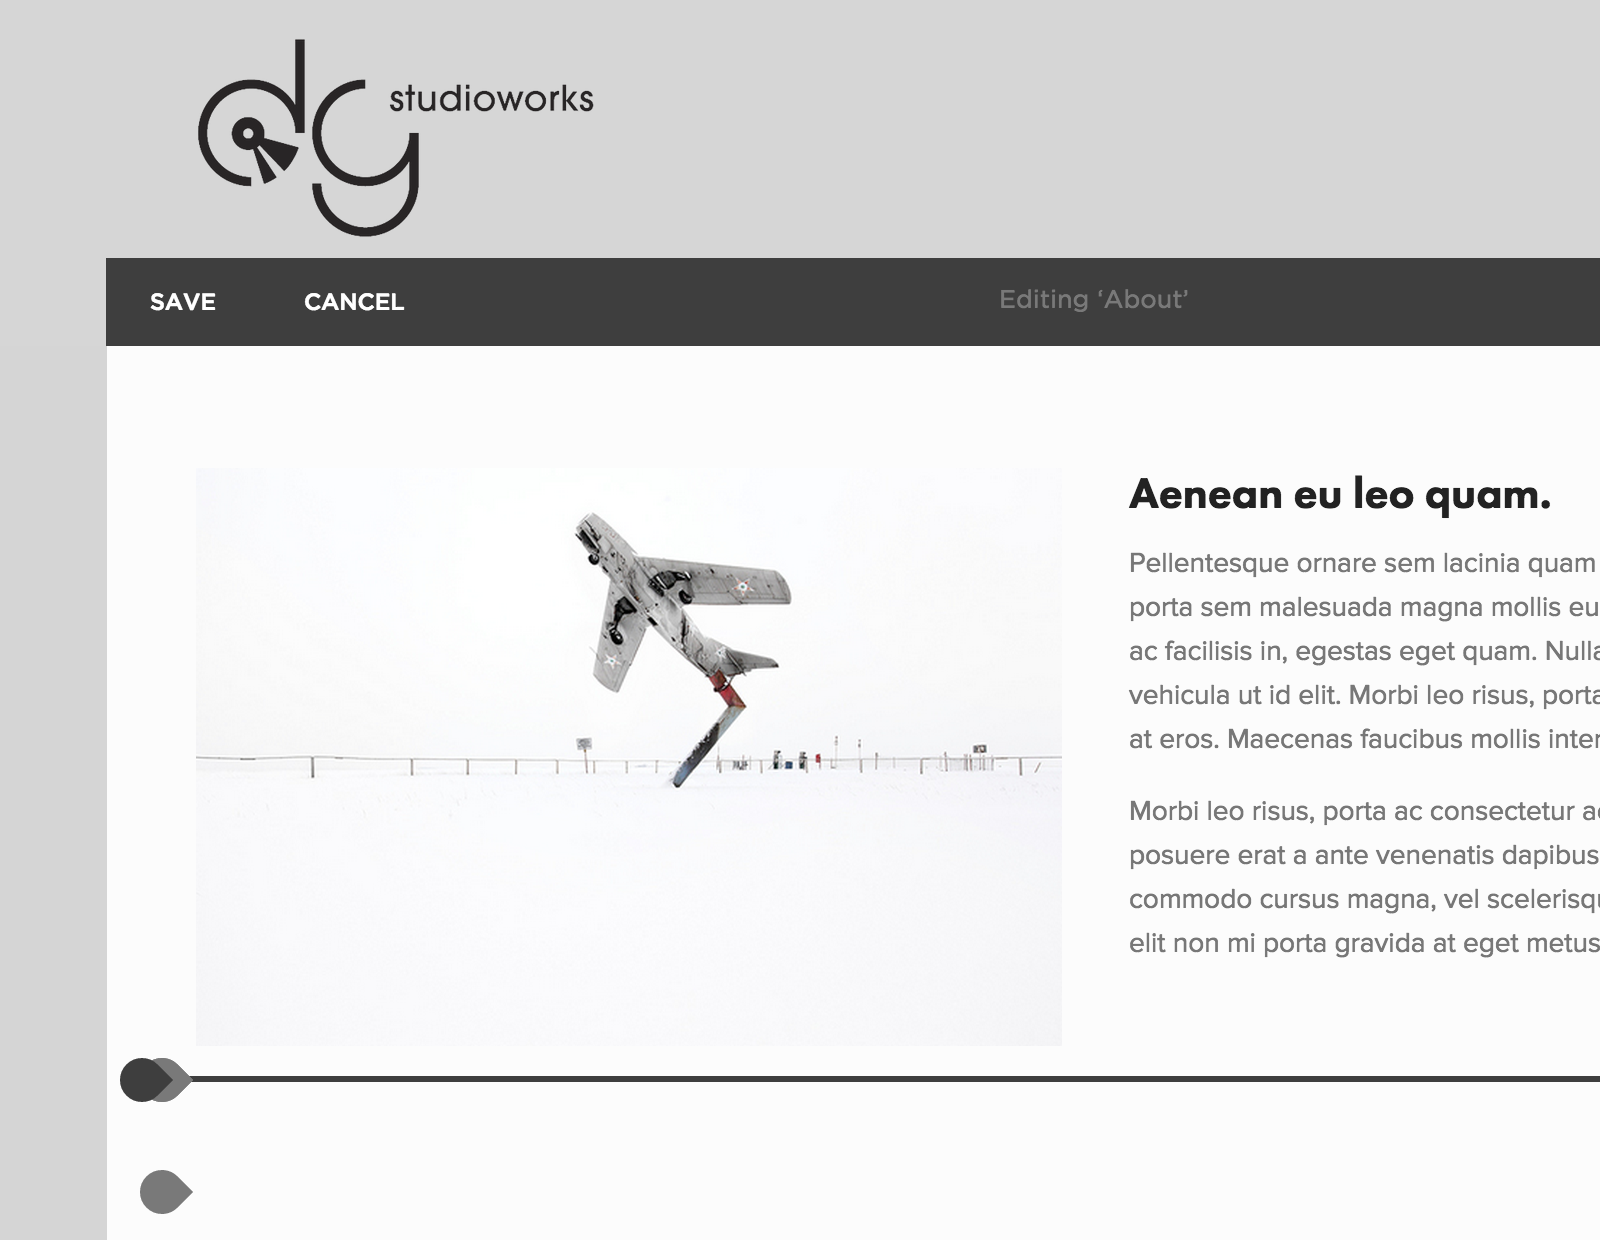
Now, let’s say we want to make the word “HERE” a Lightbox trigger. When someone clicks on the word “HERE”, the Lightbox will pop up. Find your equivalent and then switch over to editing the text in HTML mode.
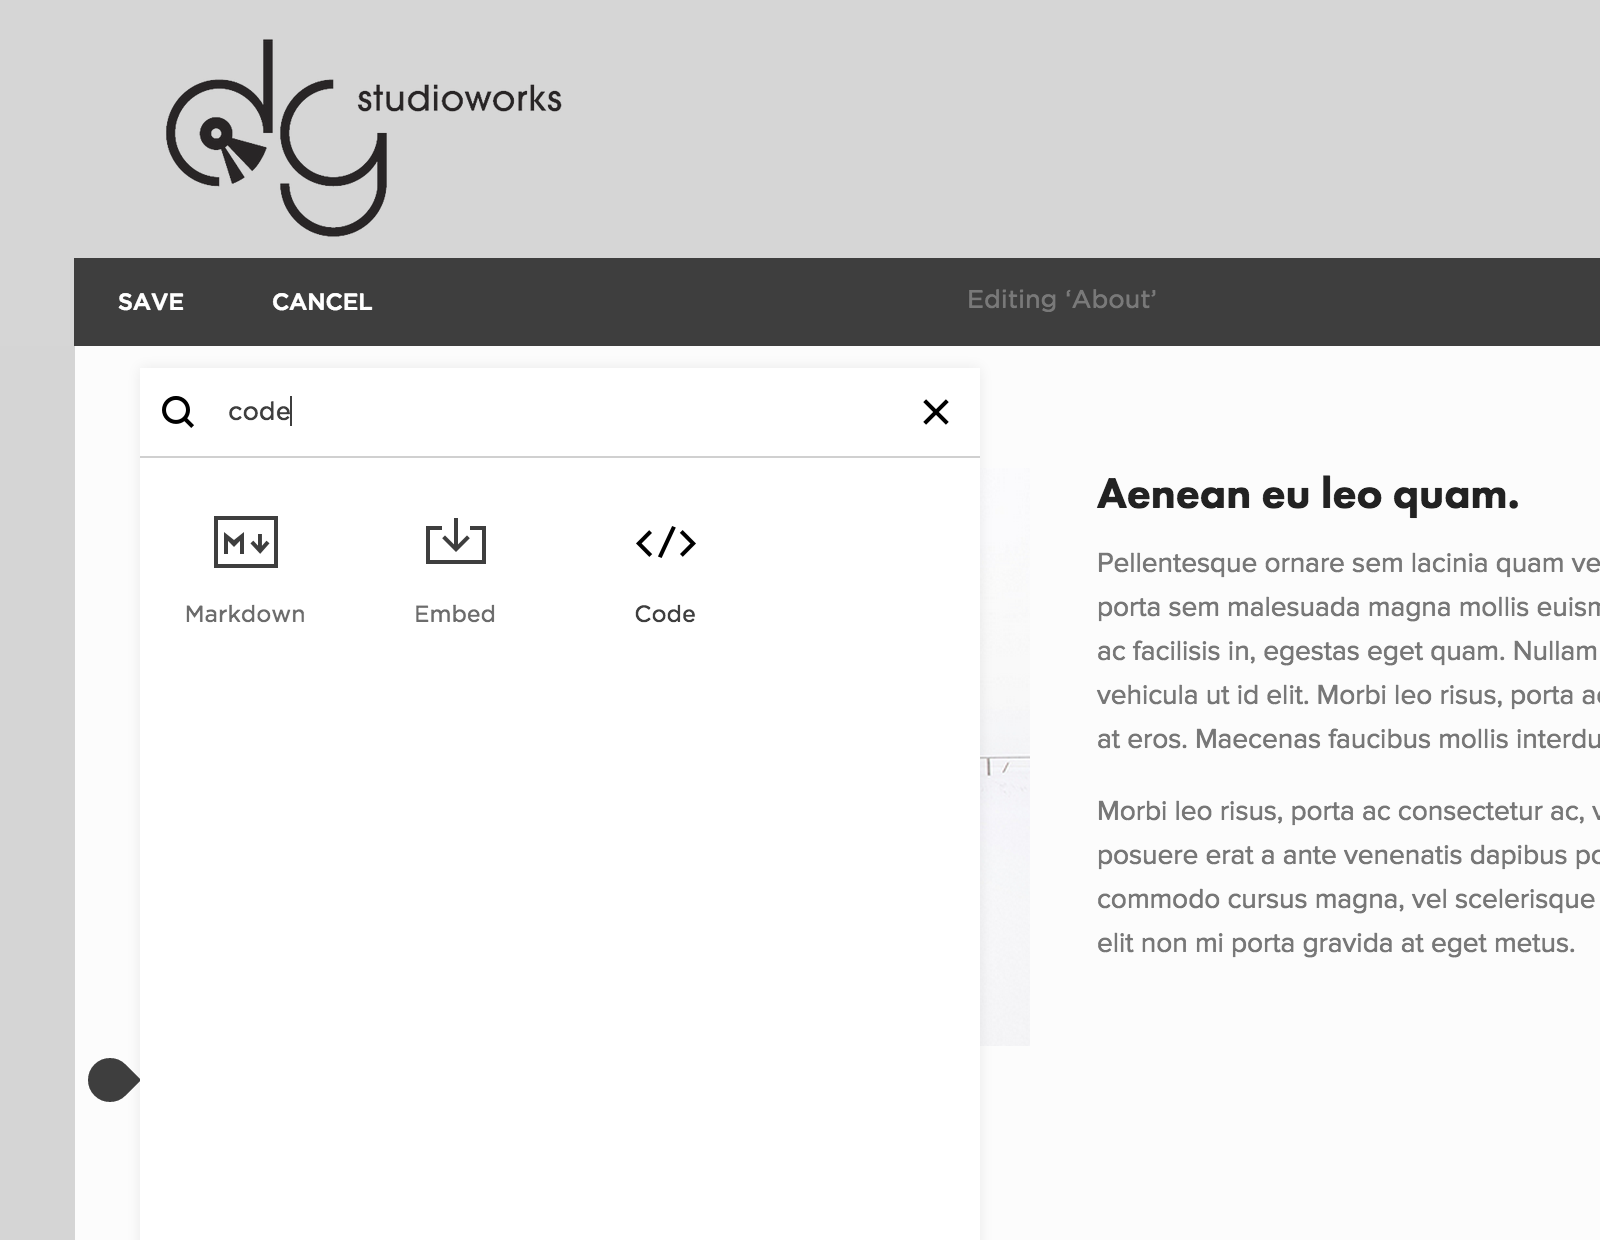
Next, head on over to the Lightbox documentation and copy the “Contact Mode” script and paste it around the trigger text or image you want. See below.

As you imagined, the Self Service Mode is also available for the Lightbox. to enable the Self Service Mode, simply copy and paste the second script as such:

The end result should look something like this:

Step 7: Contact Form

Now let’s try adding a contact form to another page. We’re going to use the “Shipping and Returns” page here so feel free to use any page of your choice. The contact form can go anywhere on your site and will take up any horizontal space. Find the page you want to insert the contact form into and access the HTML editing mode.

Head on over to the Contact Form documentation and copy the super simple script on that page. Paste it in the location you want. For this example, we just pasted the script at the very end of the page. Hit save and refresh to take a look.

To change the labels of each default contact form field, head on over to this page for your subdomain: https://YOURSUBDOMAIN.reamaze.com/admin/settings/translate/YOURSUBDOMAIN.

Step 8: Adding Form Fields to Contact Form

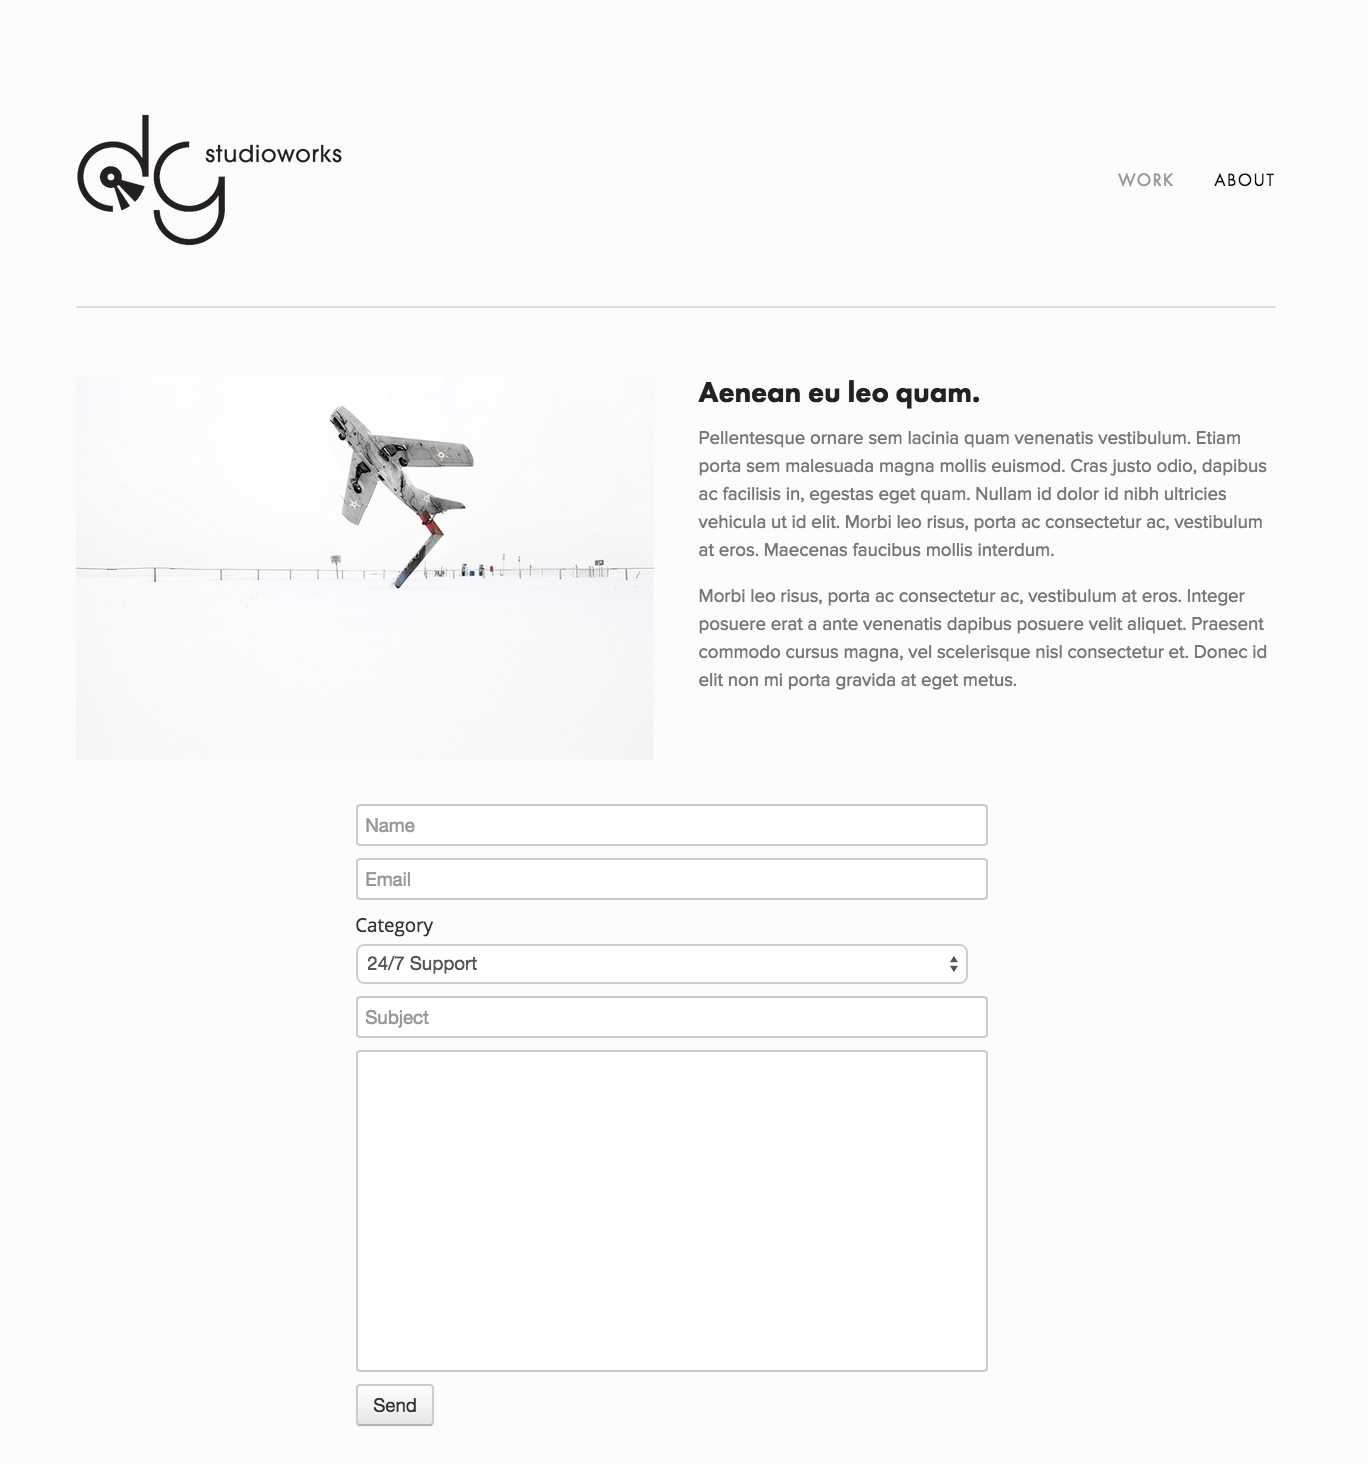
To add more fields to the contact form on your site, head on over to the Custom Form Fields documentation and just copy the example script at the bottom of the page. We did just that and changed some of the fields ourselves. In the screenshot below you’ll see that we added a dropdown field with selections for “Did not receive, Major delay, Defective return, Regular delay”.

When done, click save and refresh your page!

Did this help?

Please let us know if you have any questions or tutorial requests!

Viewing all 585 articles
Browse latest View live